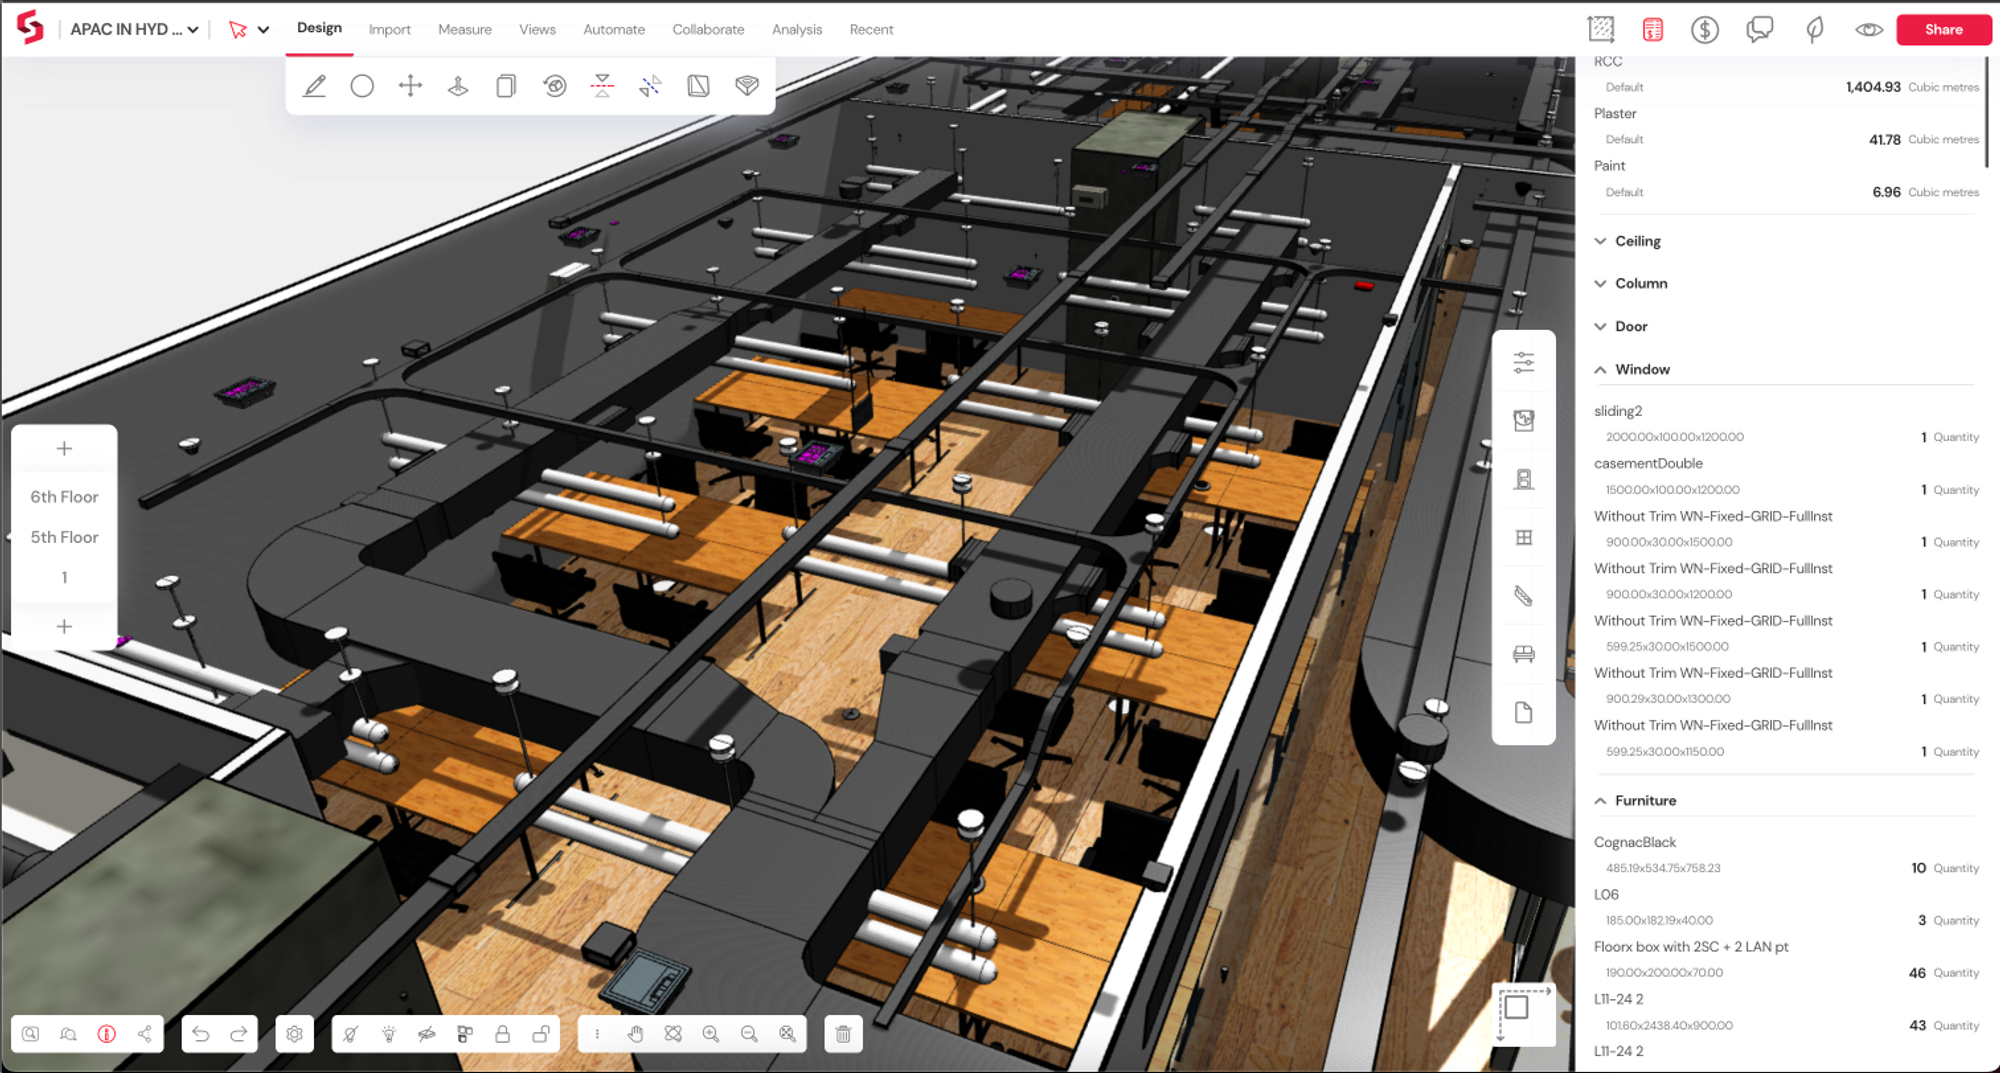
Snaptrude V1.0 Released!
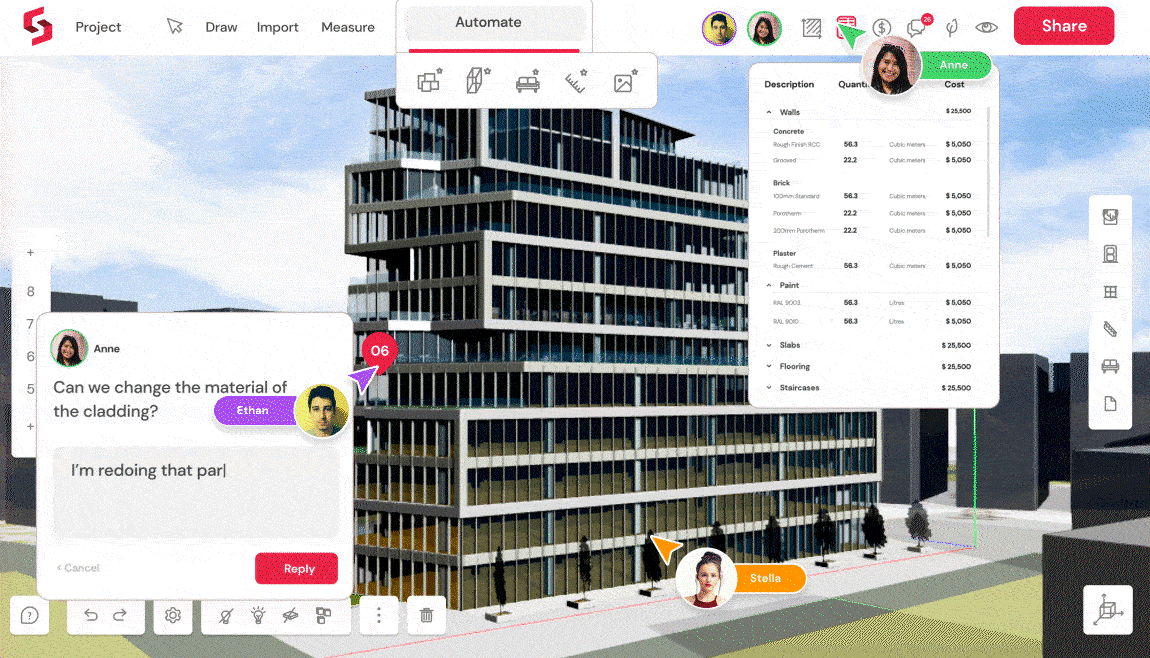
Meet the latest and most advanced version of Snaptrude yet in version 1.0!
In the spirit of Snaptrude, this version is chock full of new features and bug fixes, and we've never been more excited for you to try them out. Here is a quick rundown of the best of V1.0:
- With the newly launched Snaptrude-Revit bi-directional link, you can transfer entire models between Revit and Snaptrude without losing data!
- Take collaboration to the next level right away! Team management is much easier with the new shared workspaces.
- Never lose sight of project costs. Use Snaptrude's Change Log to track changes in project costs every step of the way.
- The new Library Manager will help keep all your 3D assets like doors, windows, furniture, or materials in one place.
- Design sustainably from the get-go. The integration of 'Cove.Tool' with Snaptrude will allow you toperform advanced daylight and energy simulations in minutes.
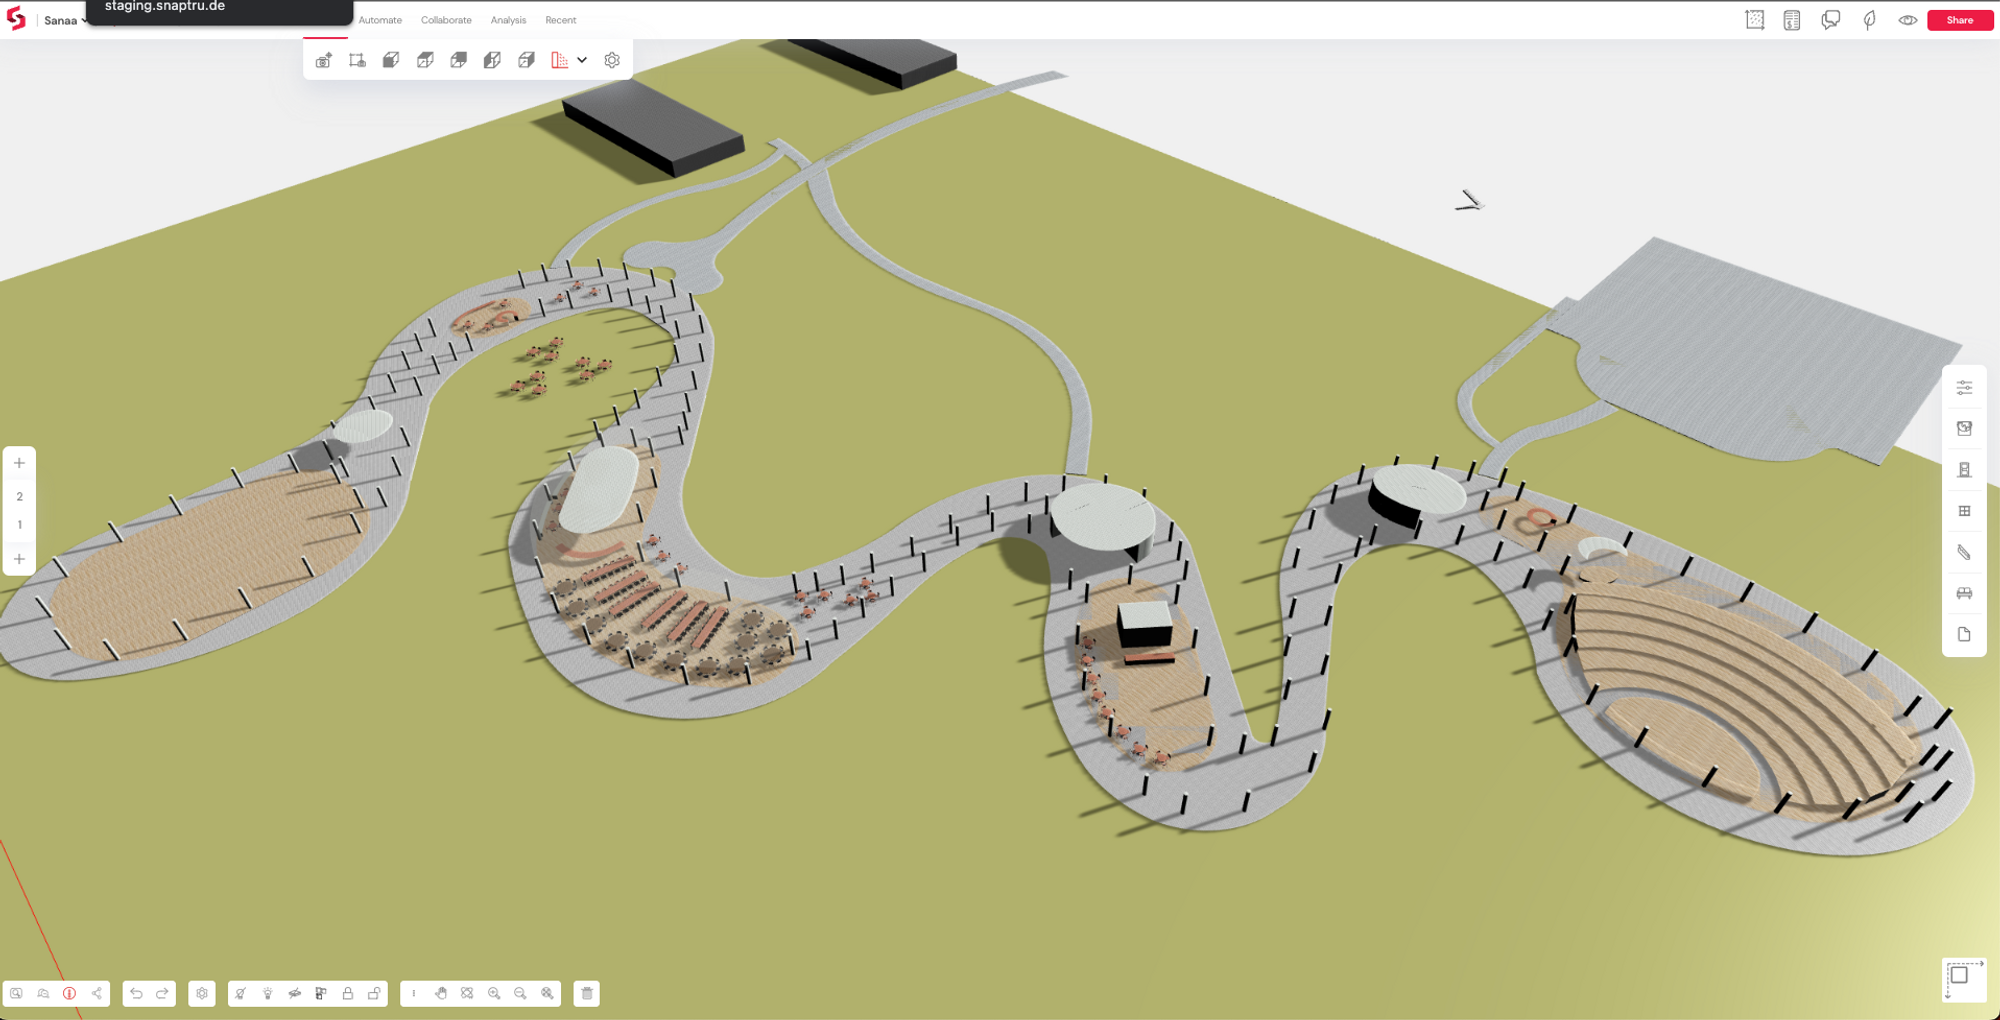
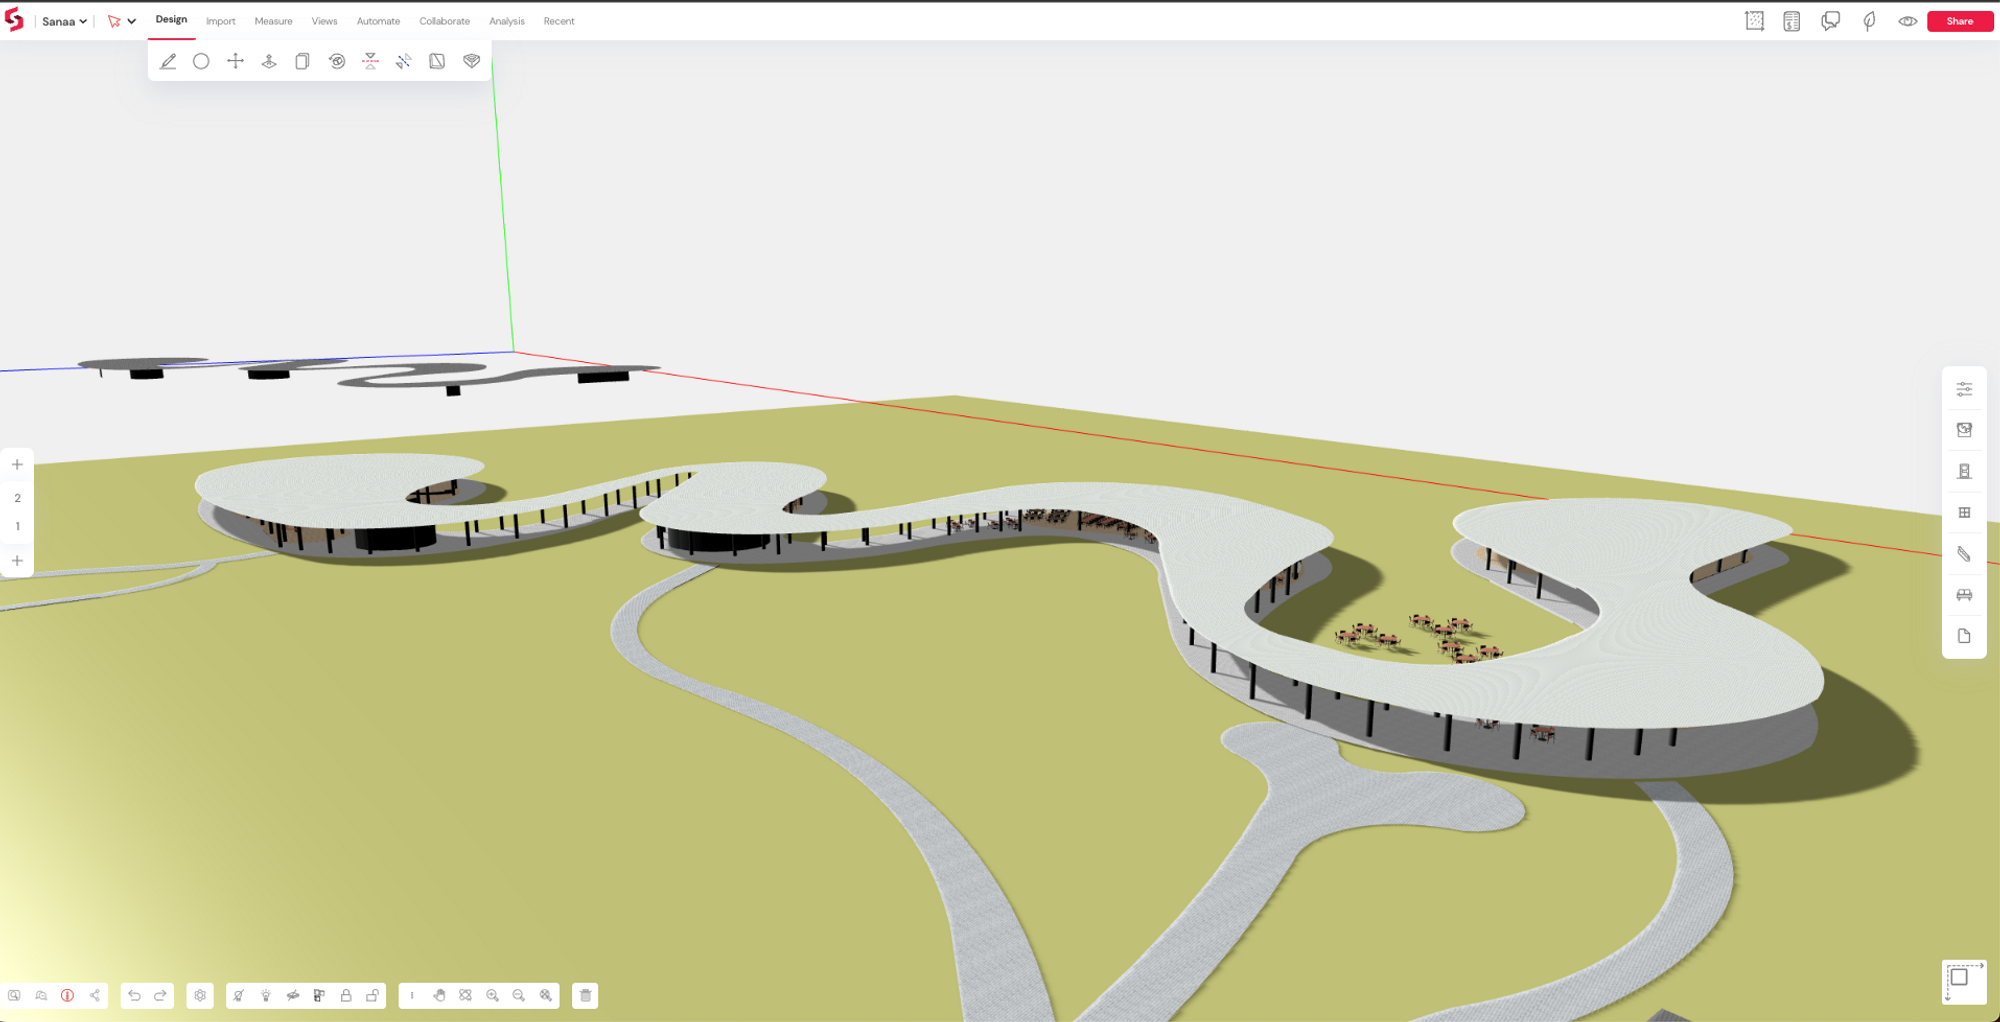
- We now have an early (but powerful) version of curved geometry on Snaptrude. Time to think outside the "box."
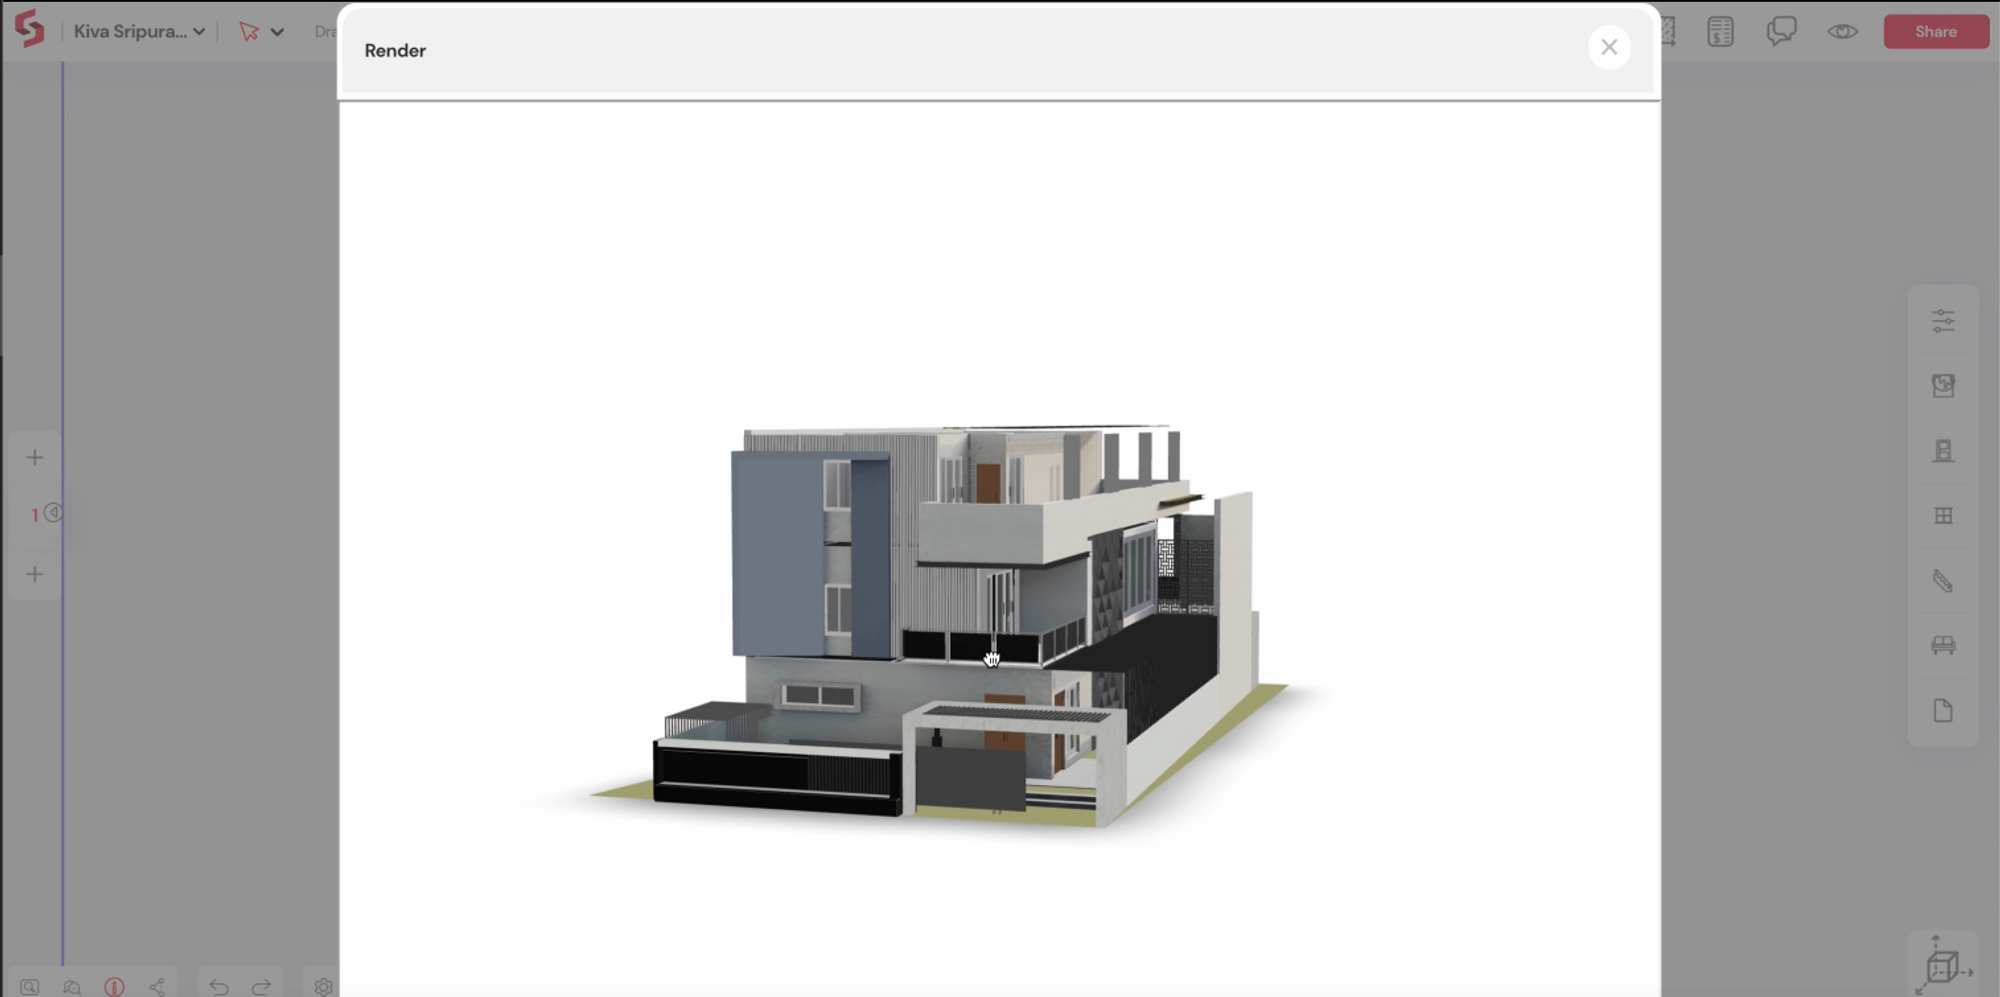
- The new rendering engine will help you render Snaptrude models directly on the browser with no need for expensive hardware.
If that wasn't enough, check out the complete list of features for V1.0.
Revit Bi-Directional Interoperability
For the last six months, we've built a bi-directional link between Snaptrude and Revit.
What does this mean? It means that you can now:
- Work inside Snaptrude with rich BIM data already established in your Revit models.
- Leverage Snaptrude's collaborative tools to streamline communication with client teams.
- Synchronize design changes seamlessly back to Revit to further document the project.
As Snaptrude runs out of a web browser, clients do not need to install heavy or expensive software on their systems. Instead, they can easily interact with and make changes to a 3D model using a simple URL. In addition, you can stay in sync with your client's requirements using in-model comments and brainstorming tools.
Once you've locked in all the design updates, get your client's sign-off on the Snaptrude model and reconcile the changes to the Revit model in seconds!


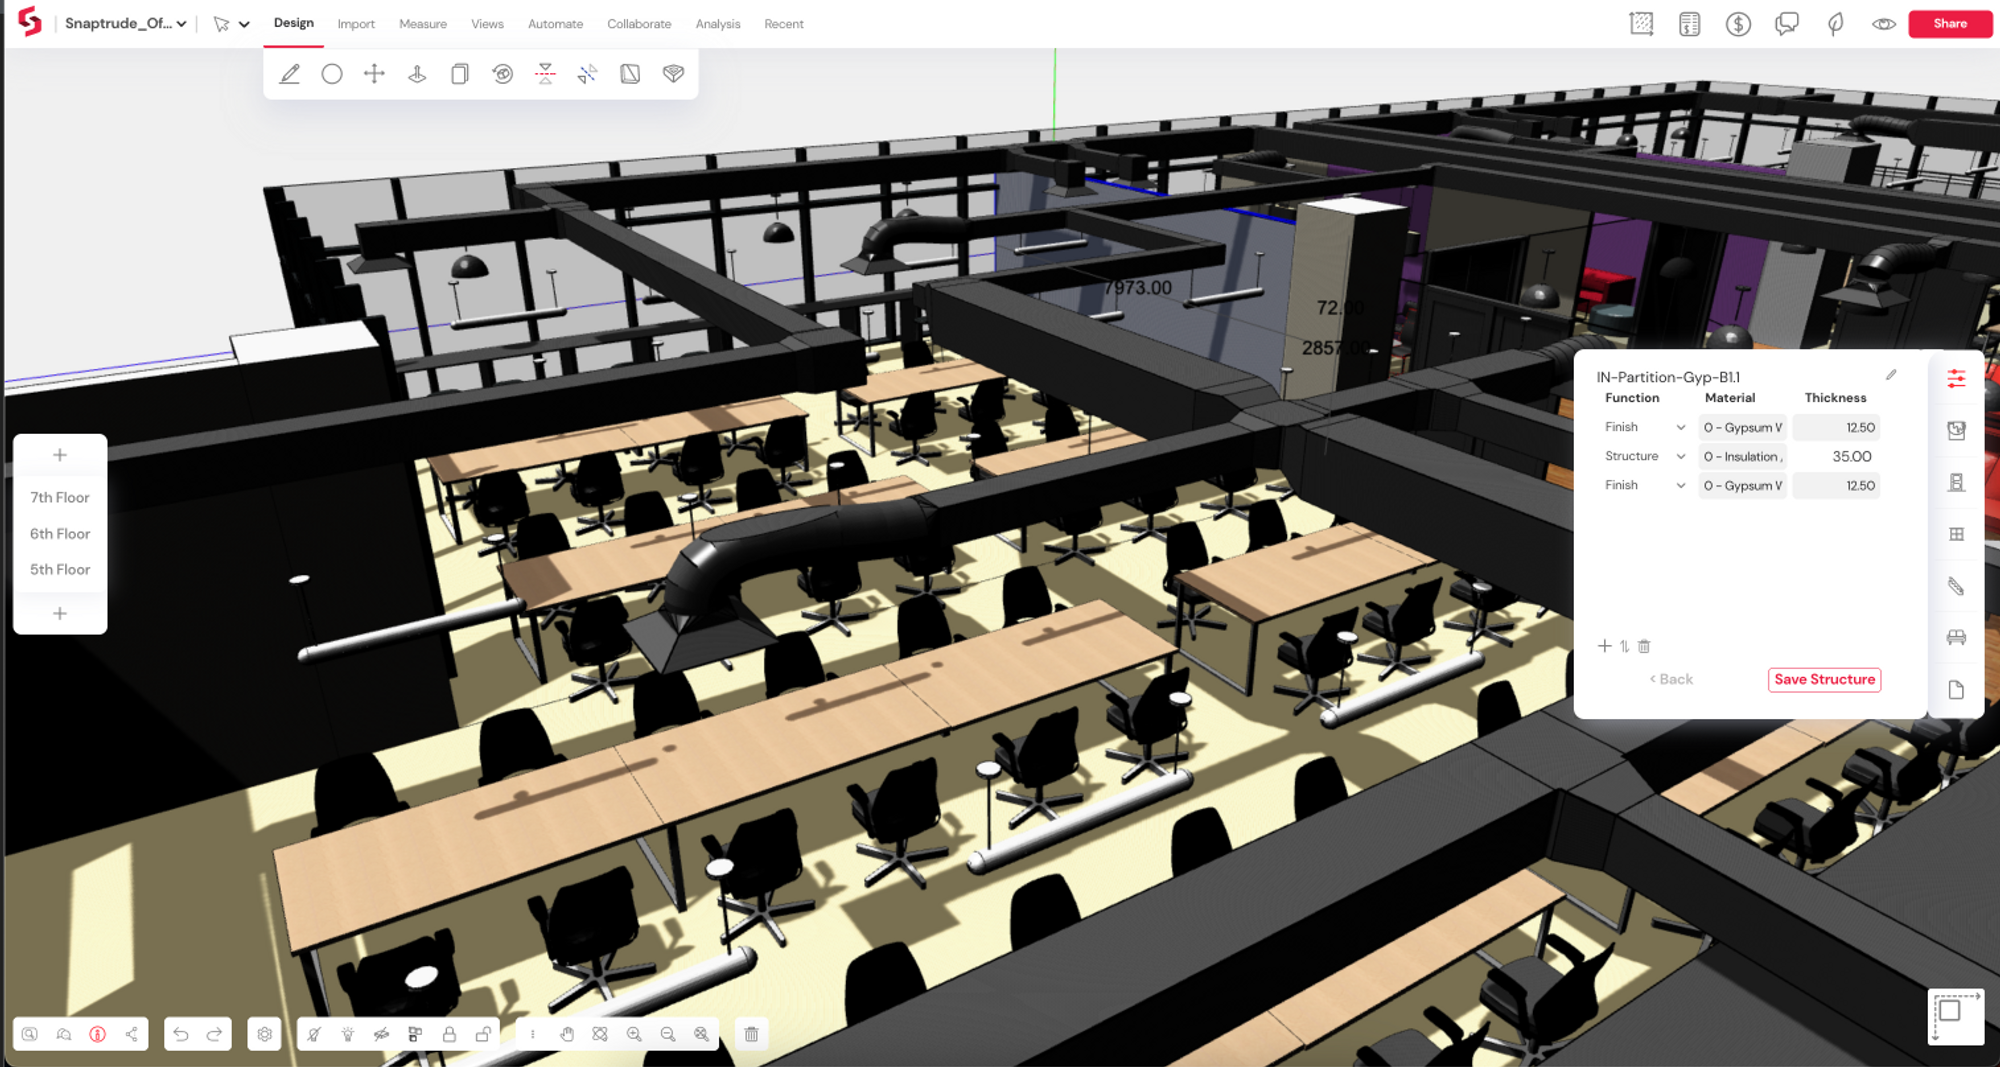
The Snaptrude Manager Addin for Revit
This is managed through the Snaptrude Manager add-in for Revit. To send a model from Revit to Snaptrude, open the Revit model, go to the Snaptrude tab and log in to Snaptrude. Then click the 'Upload to Snaptrude' button to send the Revit model to Snaptrude. Once you are happy with the changes on Snaptrude, export the model in the .trude format. Finally, use the .trude file and the Snaptrude Manager to reconcile the changes to Revit. This entire process is super quick and easy.
Currently, the Snaptrude Manager is compatible with Revit 2019, 2020, 2021, and 2022. Support for Revit 2023 will be out soon!
We support the most commonly used Revit Family types in the export and constantly work with users to add more elements. But here is a comprehensive list of elements that we support today.
- Regular walls with name, type and layer information
- Walls with profile edits on Revit
- Glass walls - with default colours and transparency
- Curtain walls - as Mullions and Panels
- Curtain walls that cut through a regular wall to create opening
- Basic stacked walls
- Curved walls - as non-editable geometry
- Option to bring in custom stacked walls with modified vertical structure - on request only
- Columns- Architectural and Structural
- Floors, floors with cutouts, floors composed of multiple "sketches"
- Doors and windows
- Objects with materials - default Revit library materials and materials present in the team library. Snaptrude defaults to grey for objects whose material isn't present in the library
- Furniture, Furniture systems, Nested furniture families
- Generic Models
- Model groups containing generic models or furniture
- Assemblies
- Caseworks
- Railings - as non-editable geometry
- Lighting devices, lighting fixtures, speciality equipment, communication devices, data devices, electrical fixtures, security devices, planting
- Ceilings- simple and compound, , ceilings with cutouts, ceilings composed of multiple "sketches"
- Linked models - imported as Locked objects by default. Ability to select linked models from Filter Selection
- Import objects inside a section box
- Basic MEP elements- Ducts, Duct Fittings, Flex Ducts, Cable Trays ,Cable Tray Fittings, Duct Accessories, Mechanical equipment, air terminals
- Import speed optimization and save speed optimizations for efficiently importing larger models
Teams & Workspaces
A Snaptrude Team is a shared workspace containing all your team's projects and libraries, making it easier to work together.
Invited colleagues can access your team's projects and 3D assets like material and furniture through the shared library. The library also allows you to maintain data such as costs, vendor information, and other properties for all objects.
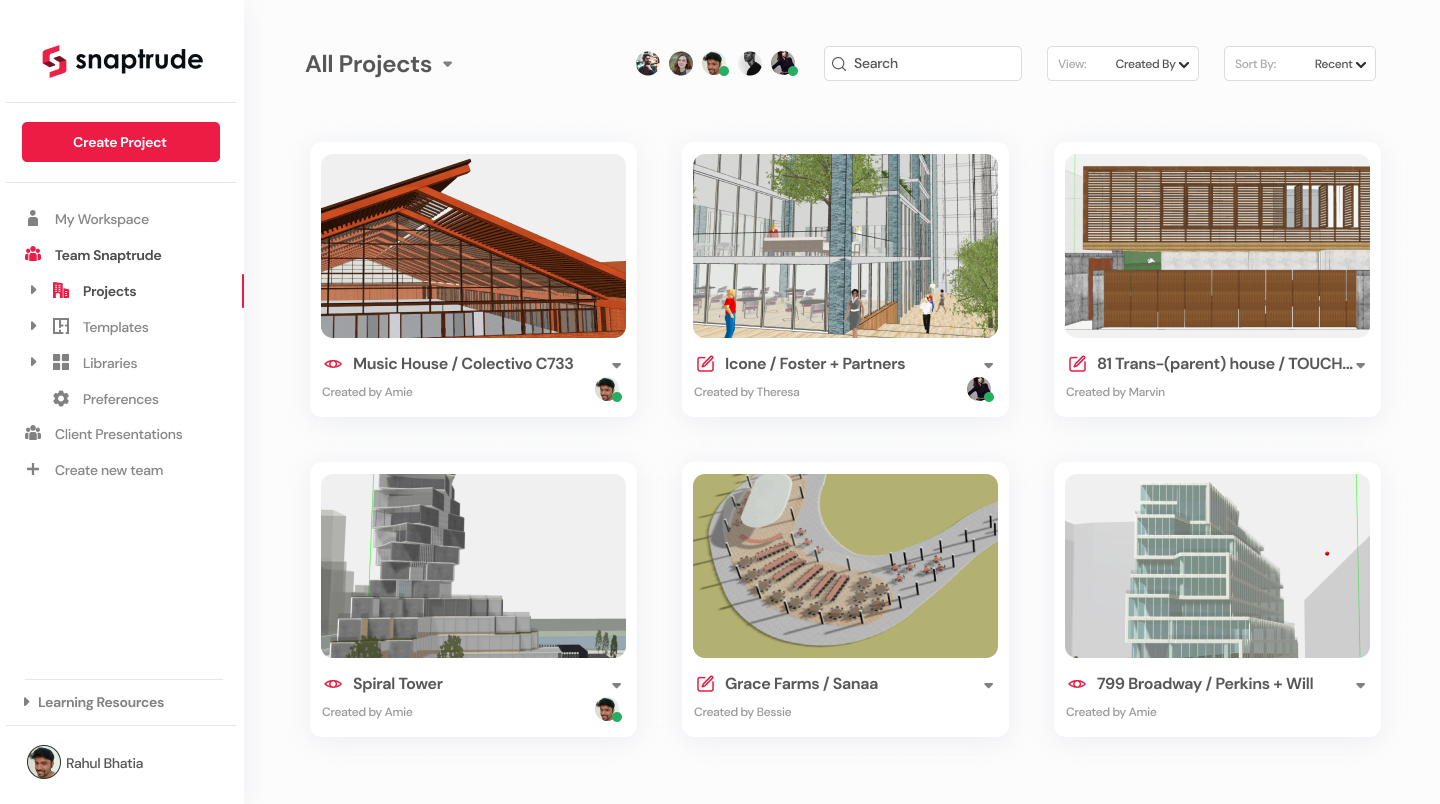
Permission levels allow managers to control user access to the projects or library. Below is a list of permission levels:
- Viewer - can view projects or libraries and add comments to projects
- Editor - can edit projects and libraries
- Creator - can create or edit projects and libraries
- Team Admin - can invite team members and manage permissions

Real-time Costing & Change Log
Snaptrude calculates project costs automatically using the following data:
- The project BoQ (which is also auto-calculated from model elements)
- Cost data added to objects and materials in the library
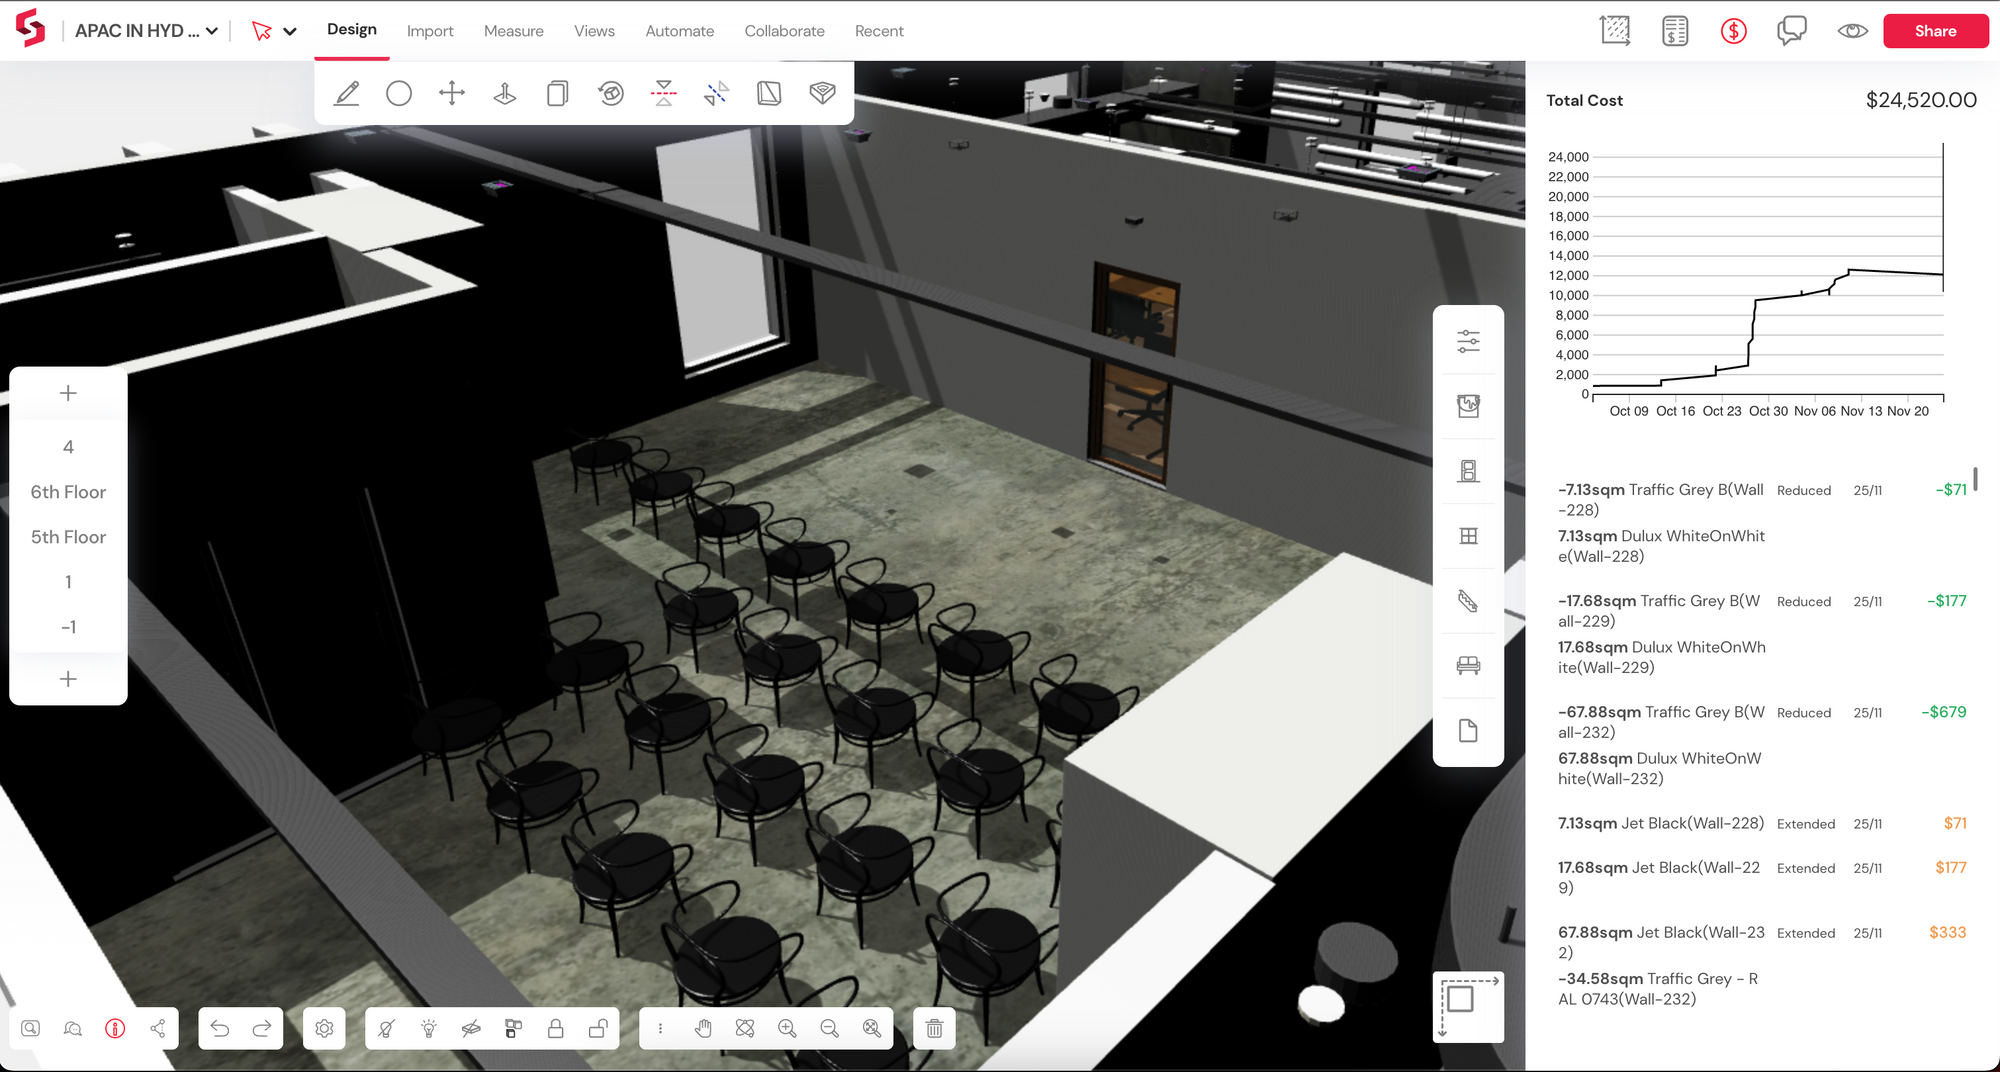
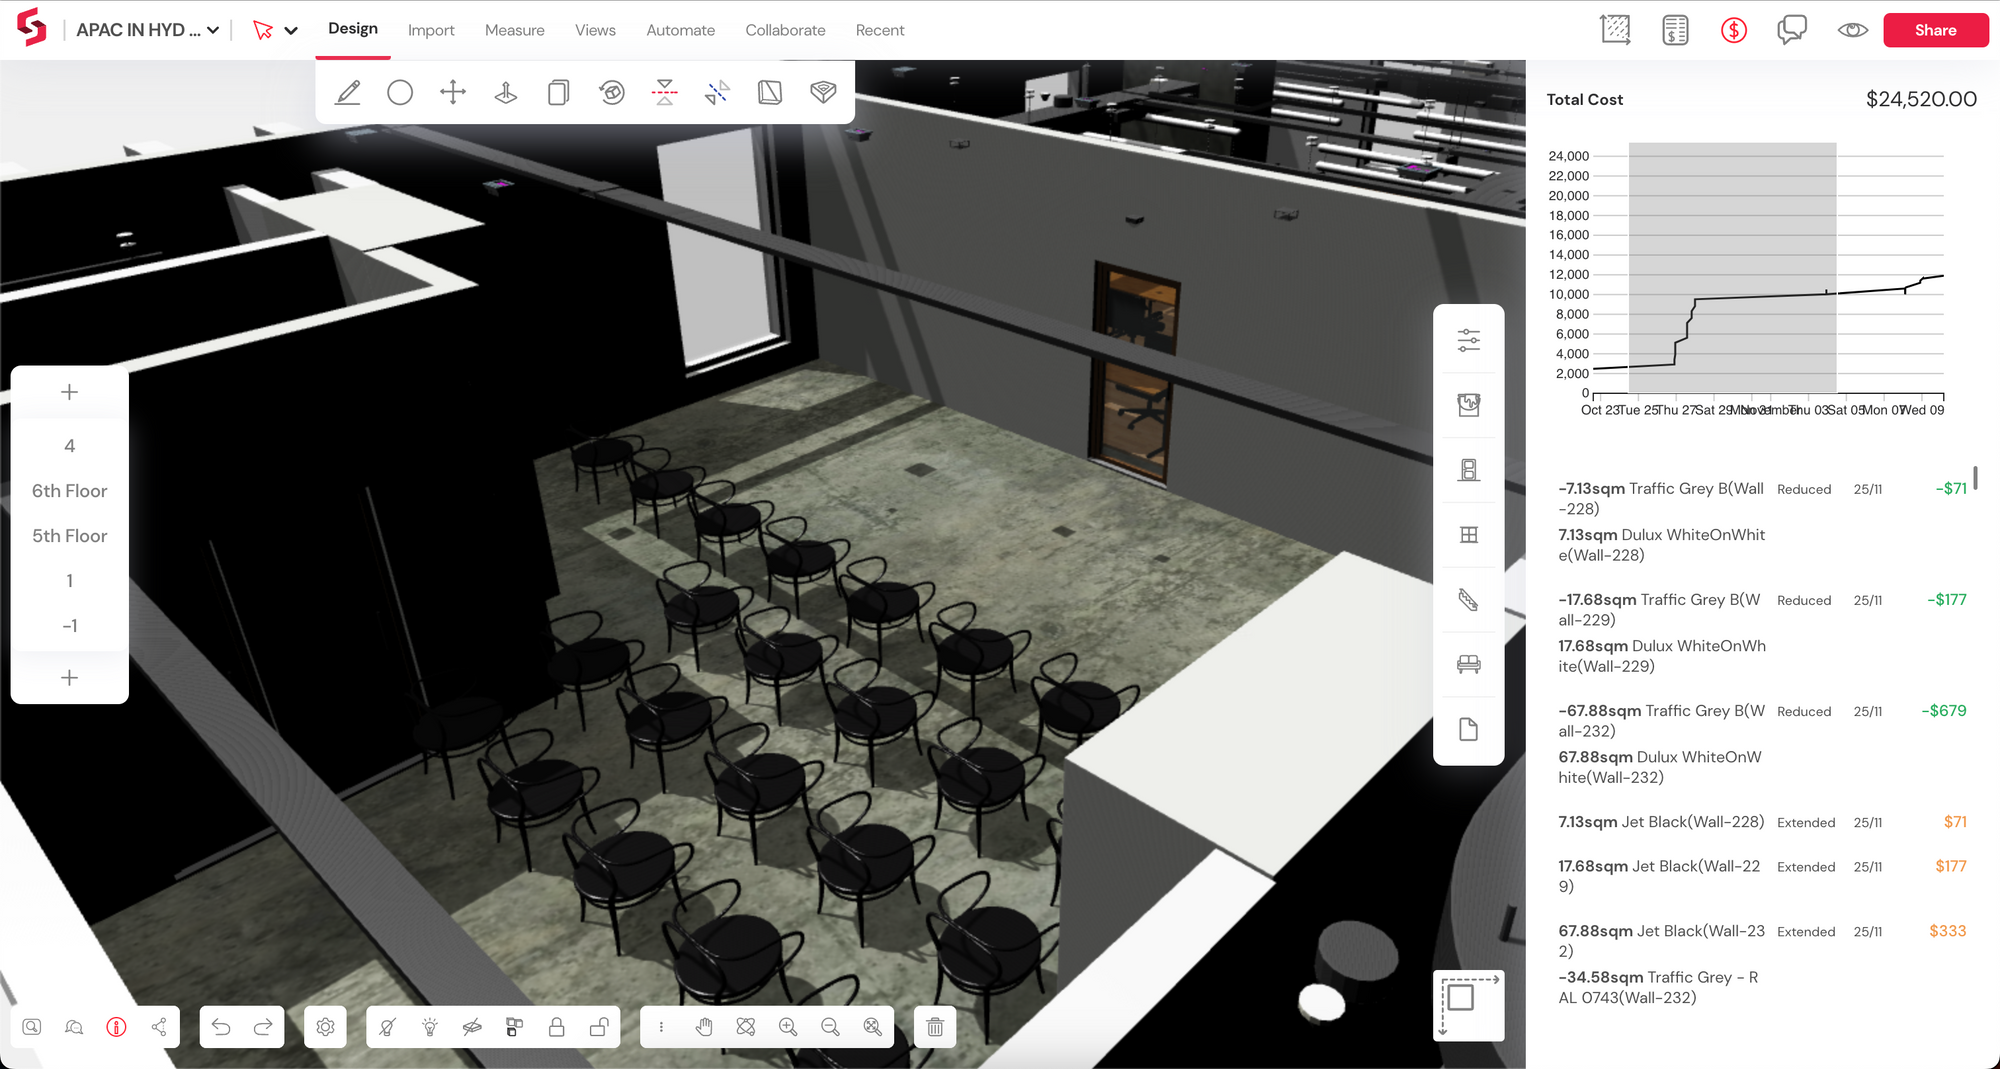
Snaptrude automatically calculates the cost for every design change or operation, minor or significant. For example, if you extend a room by 3m, the cost implications of subsequently extending the walls, floors, and slabs are all accounted for automatically. Or, when you add a door, the door's cost and the reduction in the walls' materials are both included. When you add, delete or copy furniture, costs are updated considering each item. This works for imported Revit models, too, as long as the cost associated with Revit families or materials is added to the Snaptrude library.
The Costing tab in the top right section of the UI displays the total project cost per the current design and historical changes to the project cost. You can review cost increments or decrements on a graph or by line item to get a complete picture of how design affects cost.
Centralized Library Management
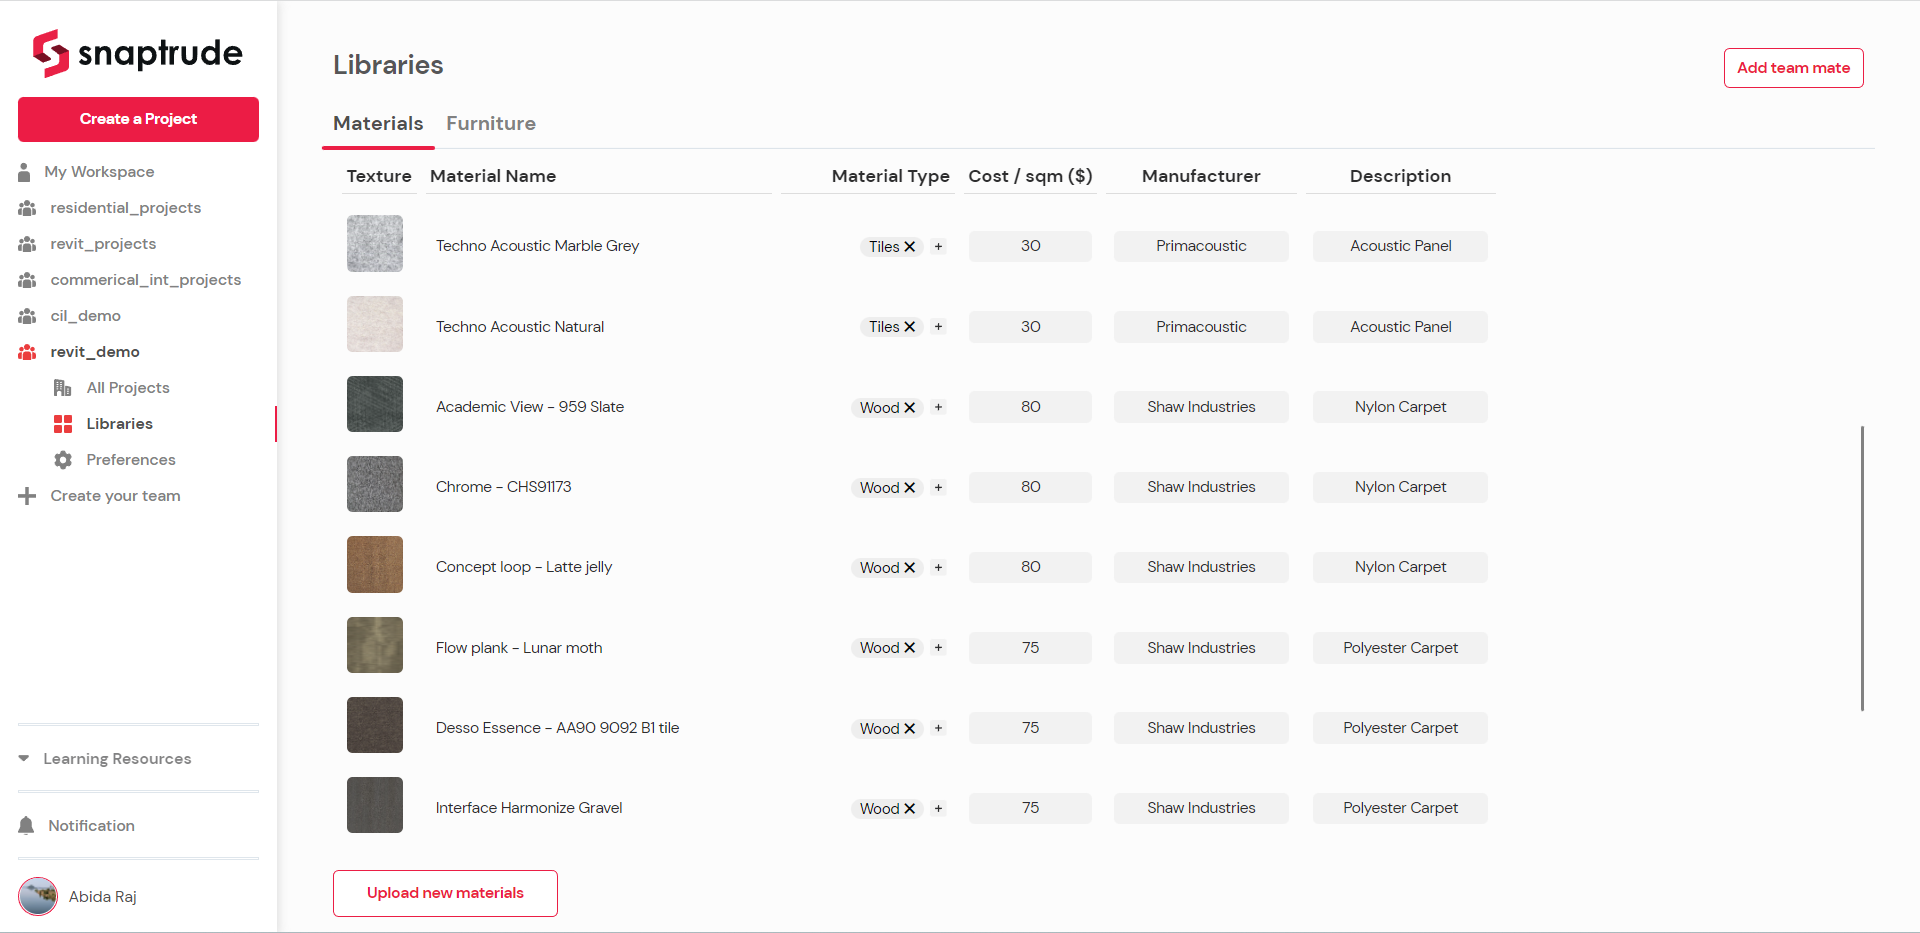
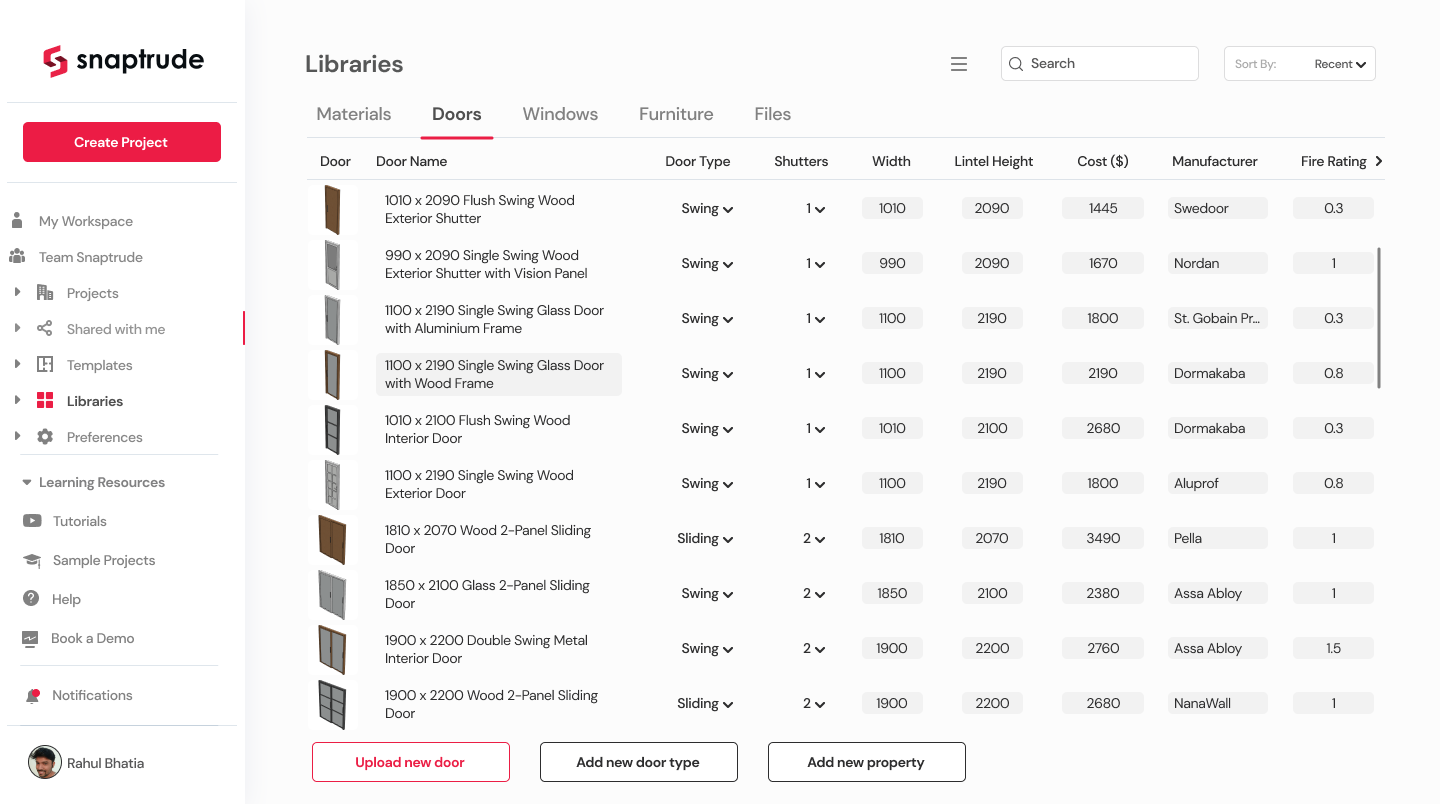
Using your firm's standards right from the initial design stage is a no-brainer, as most design teams favor a collection of materials, finishes, and furniture components for their projects. With the library manager that's part of the Snaptrude workspace, you can upload these standard assets and allow the entire team to access them when needed. Snaptrude gives you an accurate estimate right from the start when the assets are coupled with cost data.
The Team's Library also allows you to add and customize additional object properties to maintain consistency across all team projects. In Materials, for example, in addition to material type, you can add material cost, manufacturer, and a descriptive tag, if required. Similarly, for furniture, you can add a family name to group furniture of the same type; or add cost, vendor names, and a descriptive tag.
.png)
Advanced Daylight and Energy Analysis (with Cove.Tool)
For this release, we've partnered with Cove.Tool to help pursue LEED credits from within Snaptrude. This integration allows you to perform advanced daylight and energy simulation without exporting your model into different software or optimizing them. Directly analyze using the Analysis tab on the top toolbar and continue working while the analysis runs in the background.
Snaptrude does all the heavy lifting in converting your BIM model into the units and format required by the Cove.Tool. It automatically categorizes the model's various parts, like walls, roofs, columns, etc., for an accurate study. For example, it would identify objects that function as shading devices, such as pergolas, sunshades, mullions, etc. It would also tag transparent objects like glazed walls, doors, and windows as window objects or glazed roofs as skylights.
In this release, you can perform the following analysis:
- sDA or Spatial daylight autonomy
- ASE or Annual Sunlight Exposure
- EUI or Energy Use Intensity
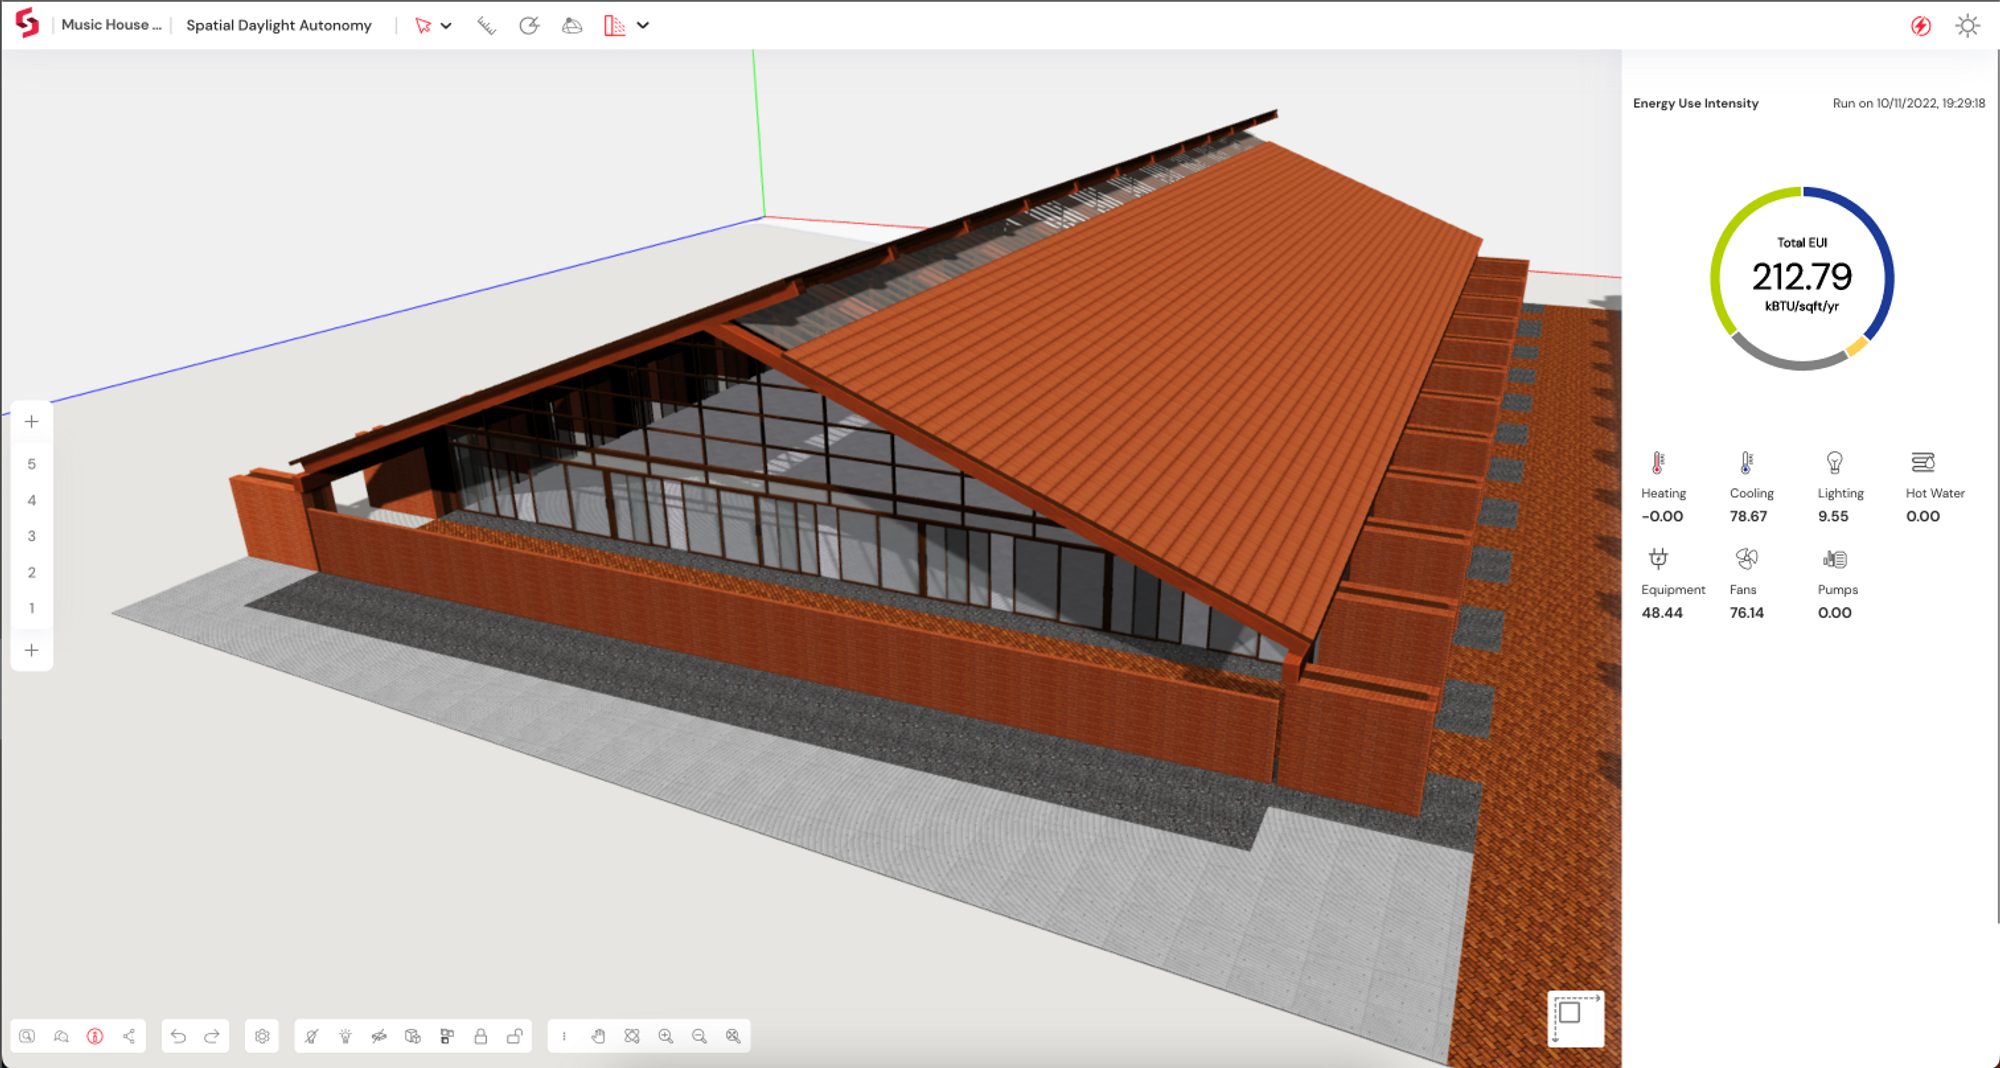
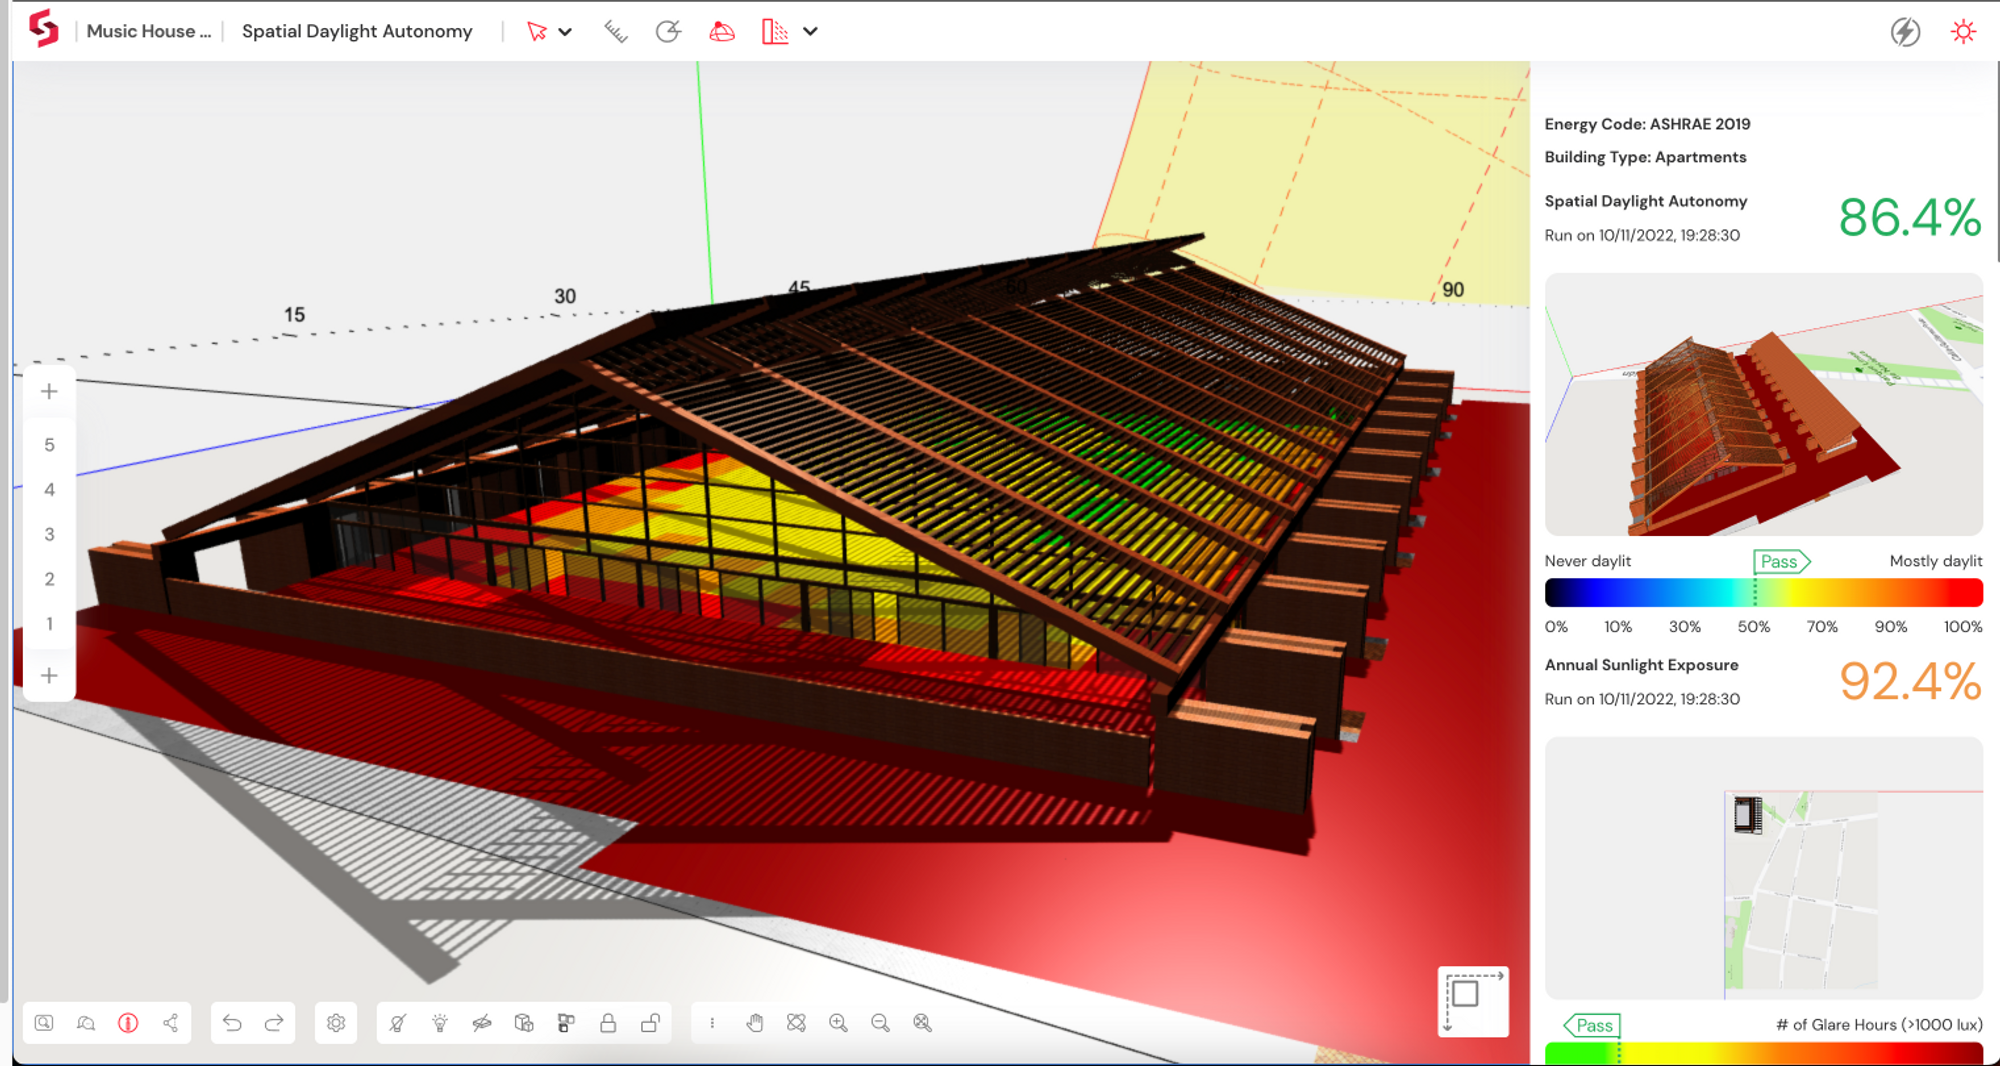
When you click on any analysis tools, you are first asked to select the project location. The tool auto-populates some basic information like appropriate energy codes and building typology based on data available in your model and runs the analysis. You can change these settings as required at any time.
The simulation would take up to 2 minutes to end, depending on the complexity of the model. Once complete, the results open in a new tab: a simplified interface with the tools to help you evaluate them. For example, you can measure objects using the Measure tool or display the Sun path & shadows to better visualize seasonal variations.
The analysis tools are built to help you iteratively improve your design. Each time you run the analysis on a model, a version of that model is saved with the corresponding results. You can then compare and contrast the effects of various design decisions.
Split
We're constantly working on making the Draw tool more powerful and intuitive. In the new update, the draw tool can be used to split Rooms or Spaces into smaller Rooms or Spaces. This allows you to look at designs from the inside or the outside. You can start with a master plan and break it into component parts or from smaller rooms, eventually building it up to a master plan. Or, you can do a bit of both using the same Draw tool. Combined with Copying and Labelling, this gives the Draw tool superpowers! Here are some examples:
- Layout buildings on a masterplan and split them into units, say 3- bedroom or 4-bedroom apartments. You can further detail these units into individual rooms: living, dining, bedroom, etc.
- Or, you can start by laying out units on a floor plate, then create the storeys or buildings to satisfy the area requirements. Once you're happy with the numerics, you can detail each unit. Just "split" one unit into its component rooms, and all copies of that unit are automatically split too!
To split a Room, use the Draw tool, and draw a polyline across the room. The room is now divided into two rooms that can be edited independently and parametrically.

Design Sign-Off or Approvals
Wrap up every project stage, with a sign-off from the client directly on Snaptrude. From the Comments History tab, select the user you wish to get a sign-off from. They will receive an email notifying them of the request. The client can then review the model, add comments to request changes, or give their sign-off.
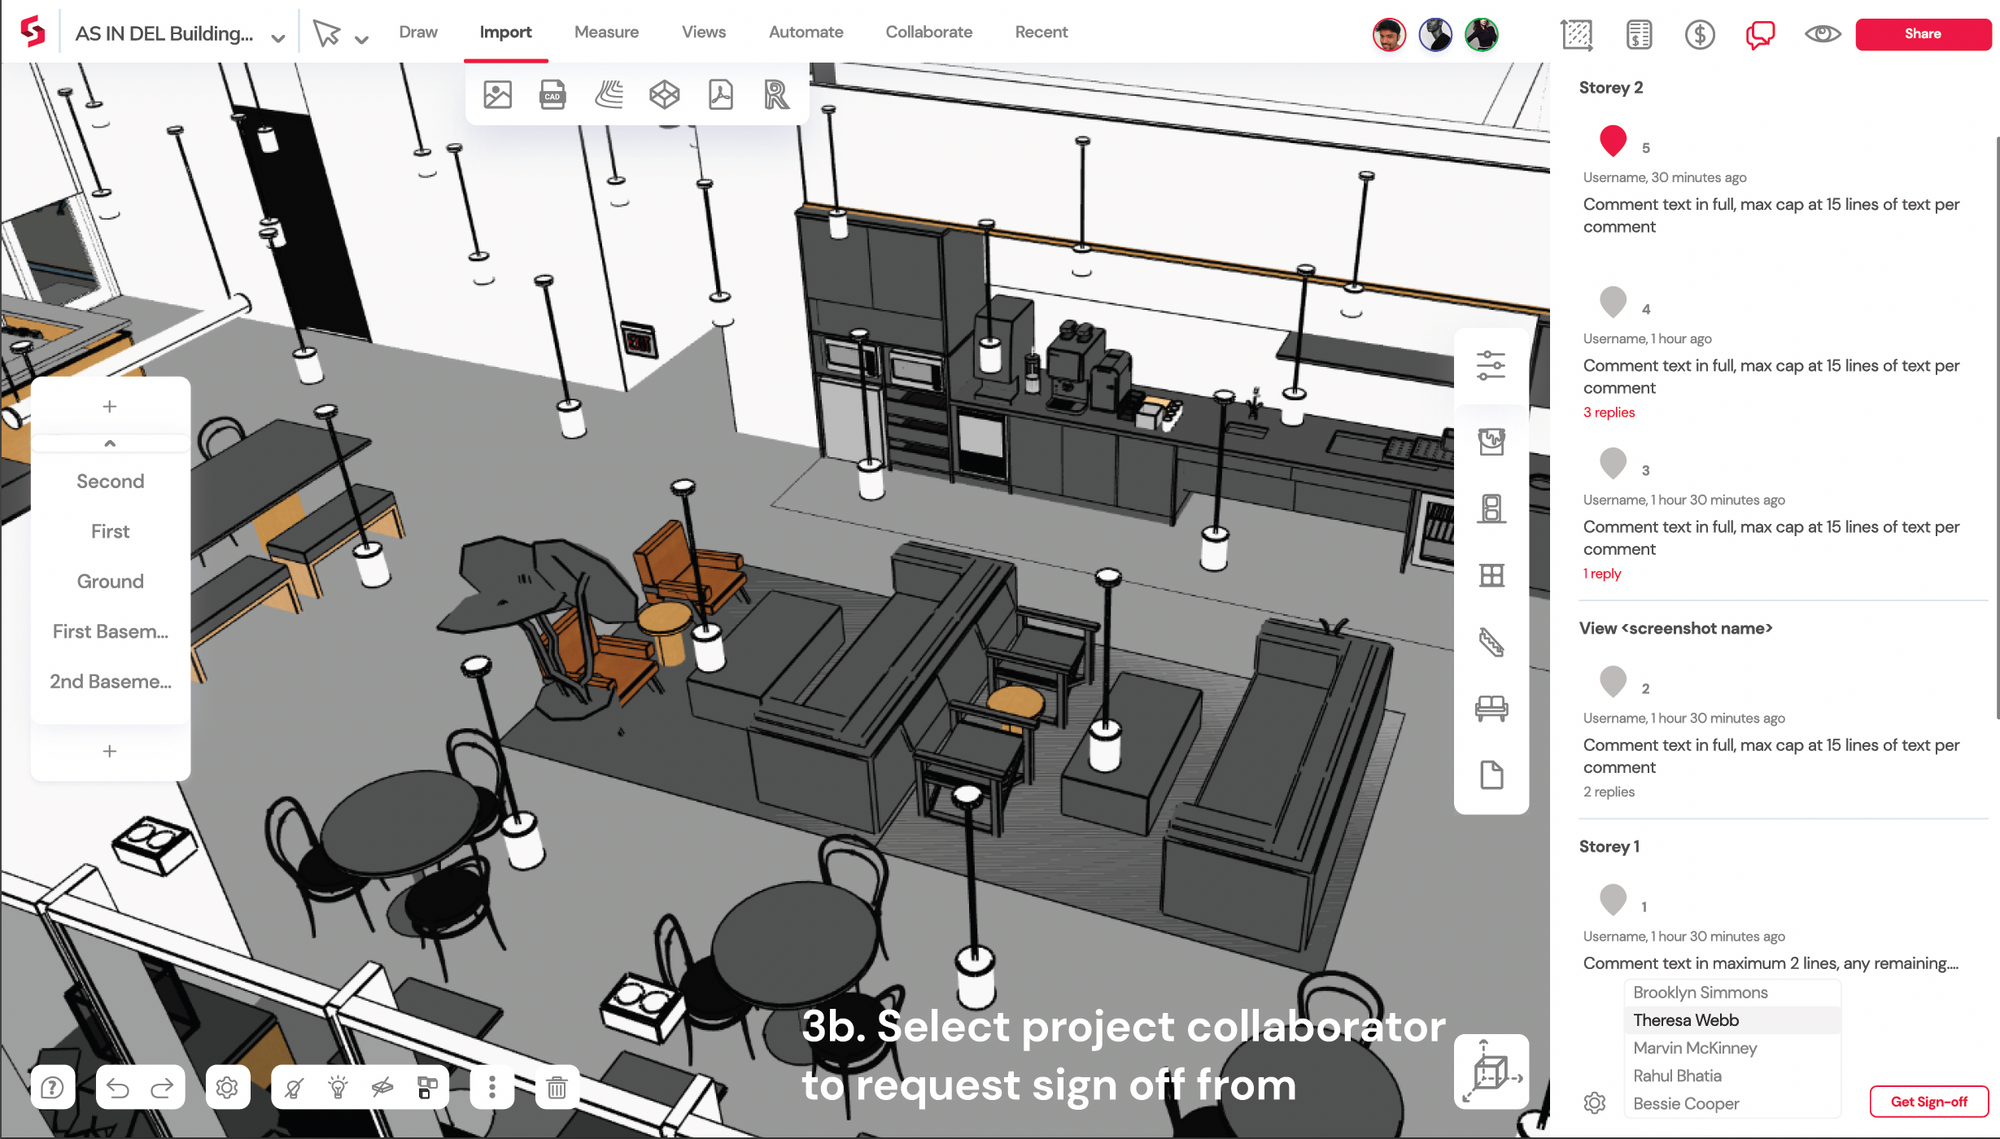
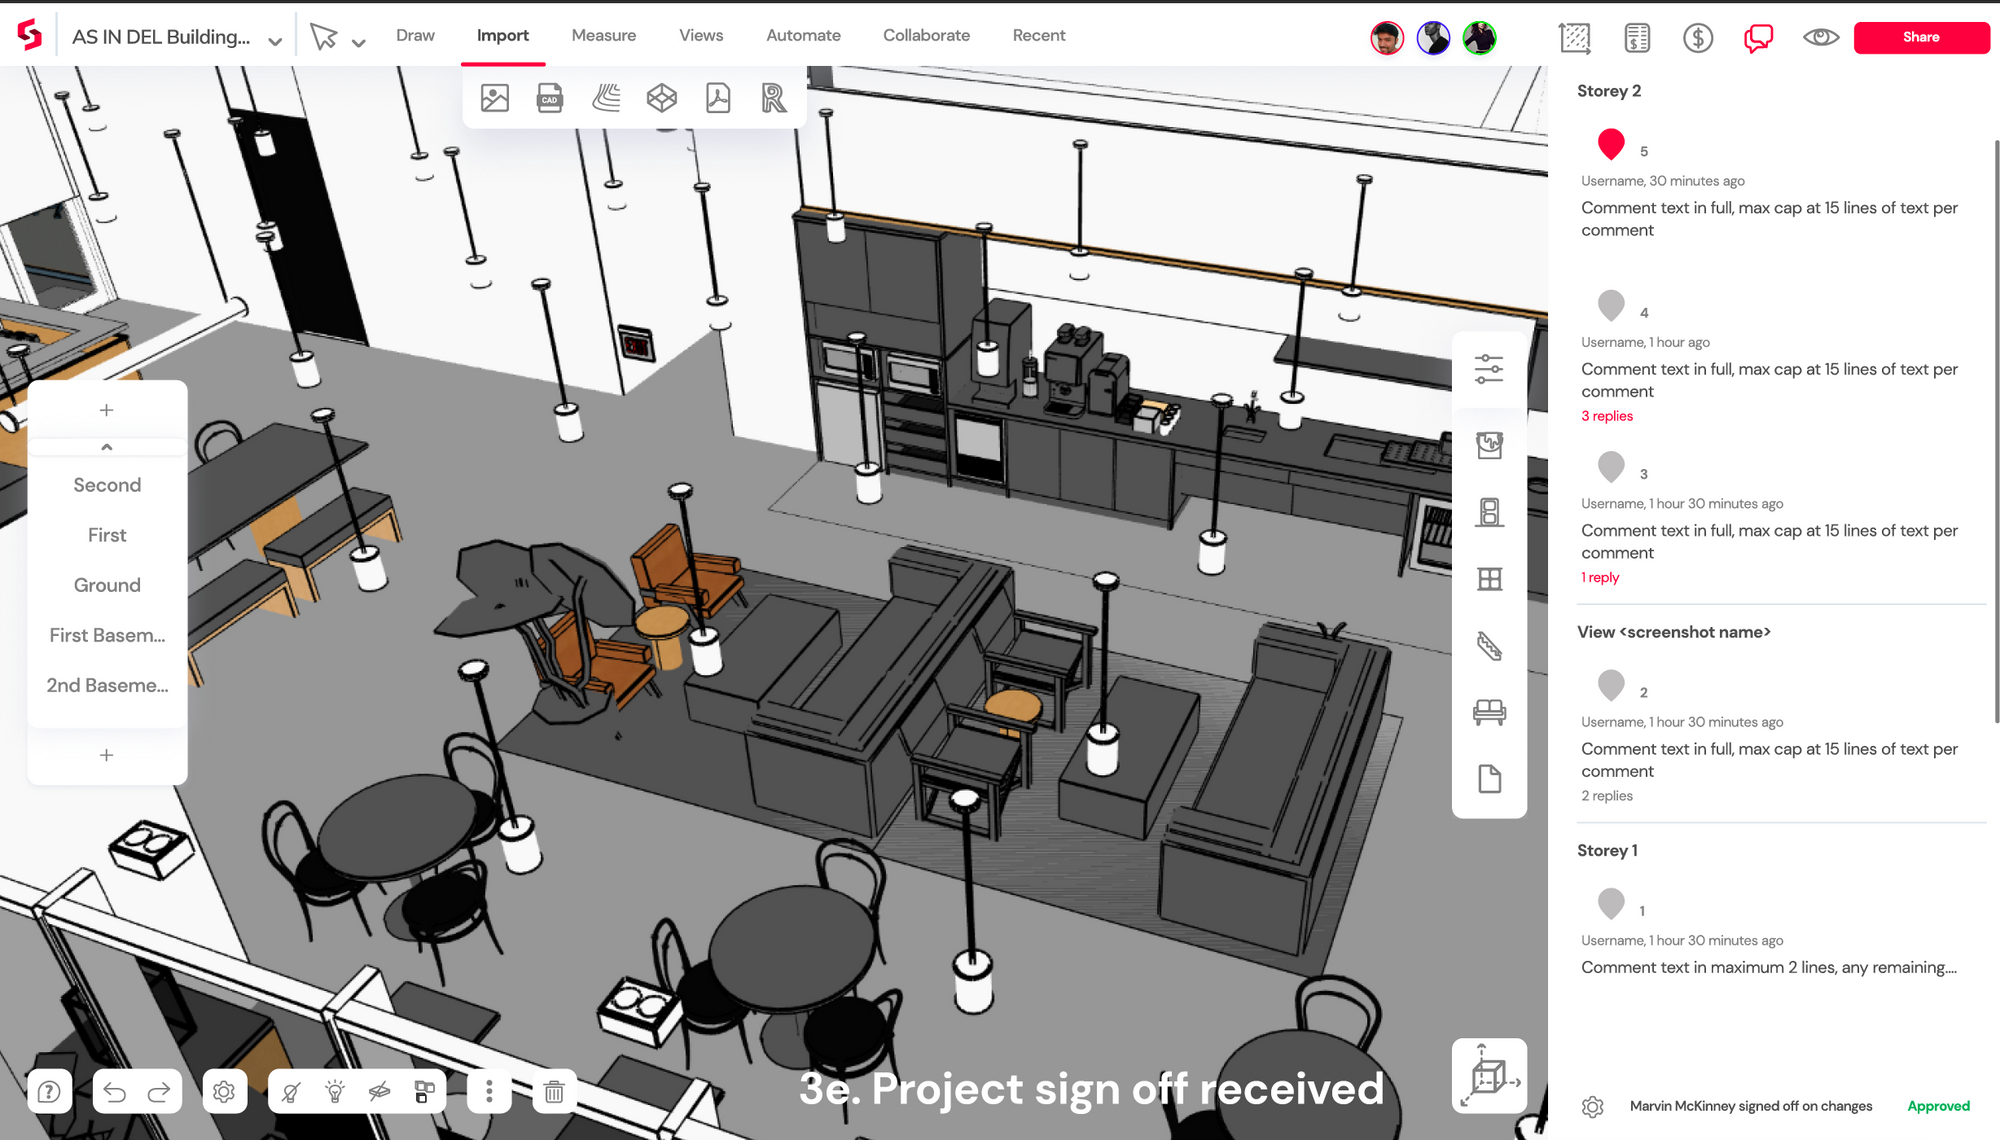
Better 3D Visuals
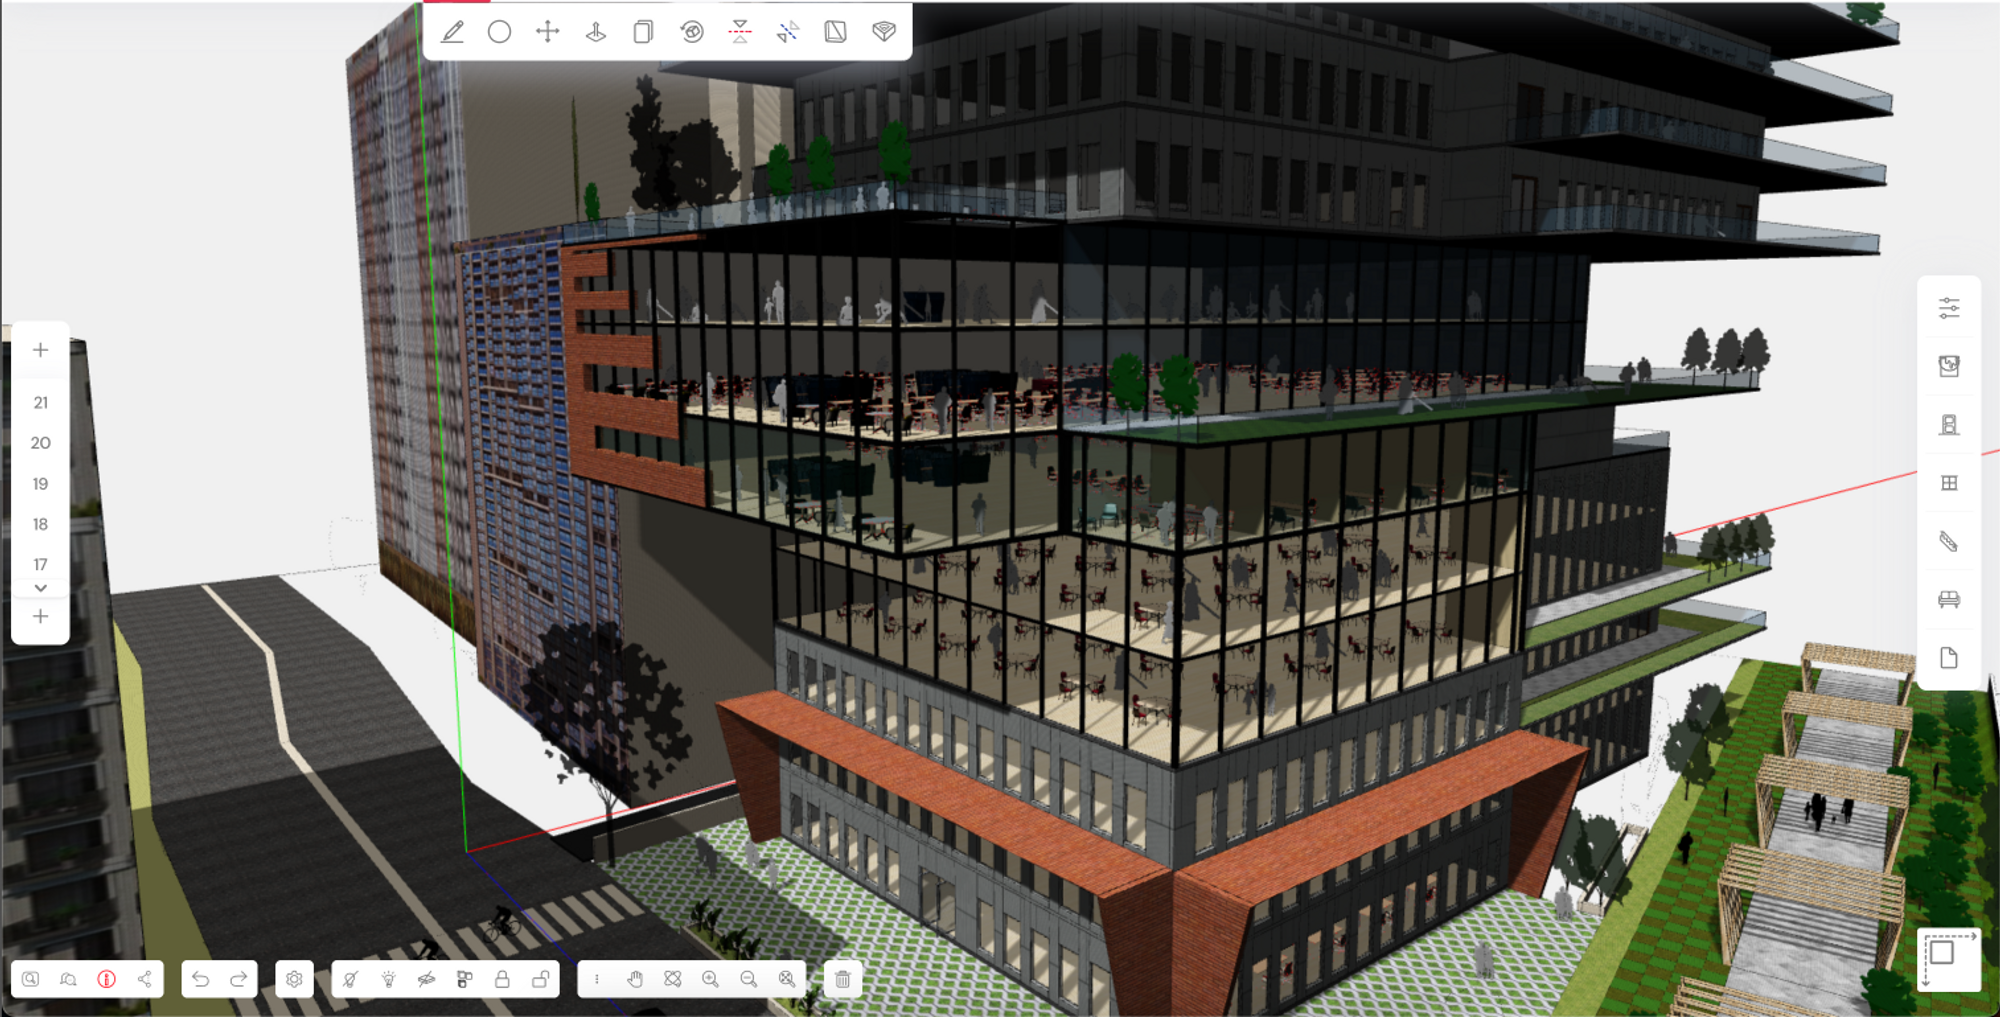
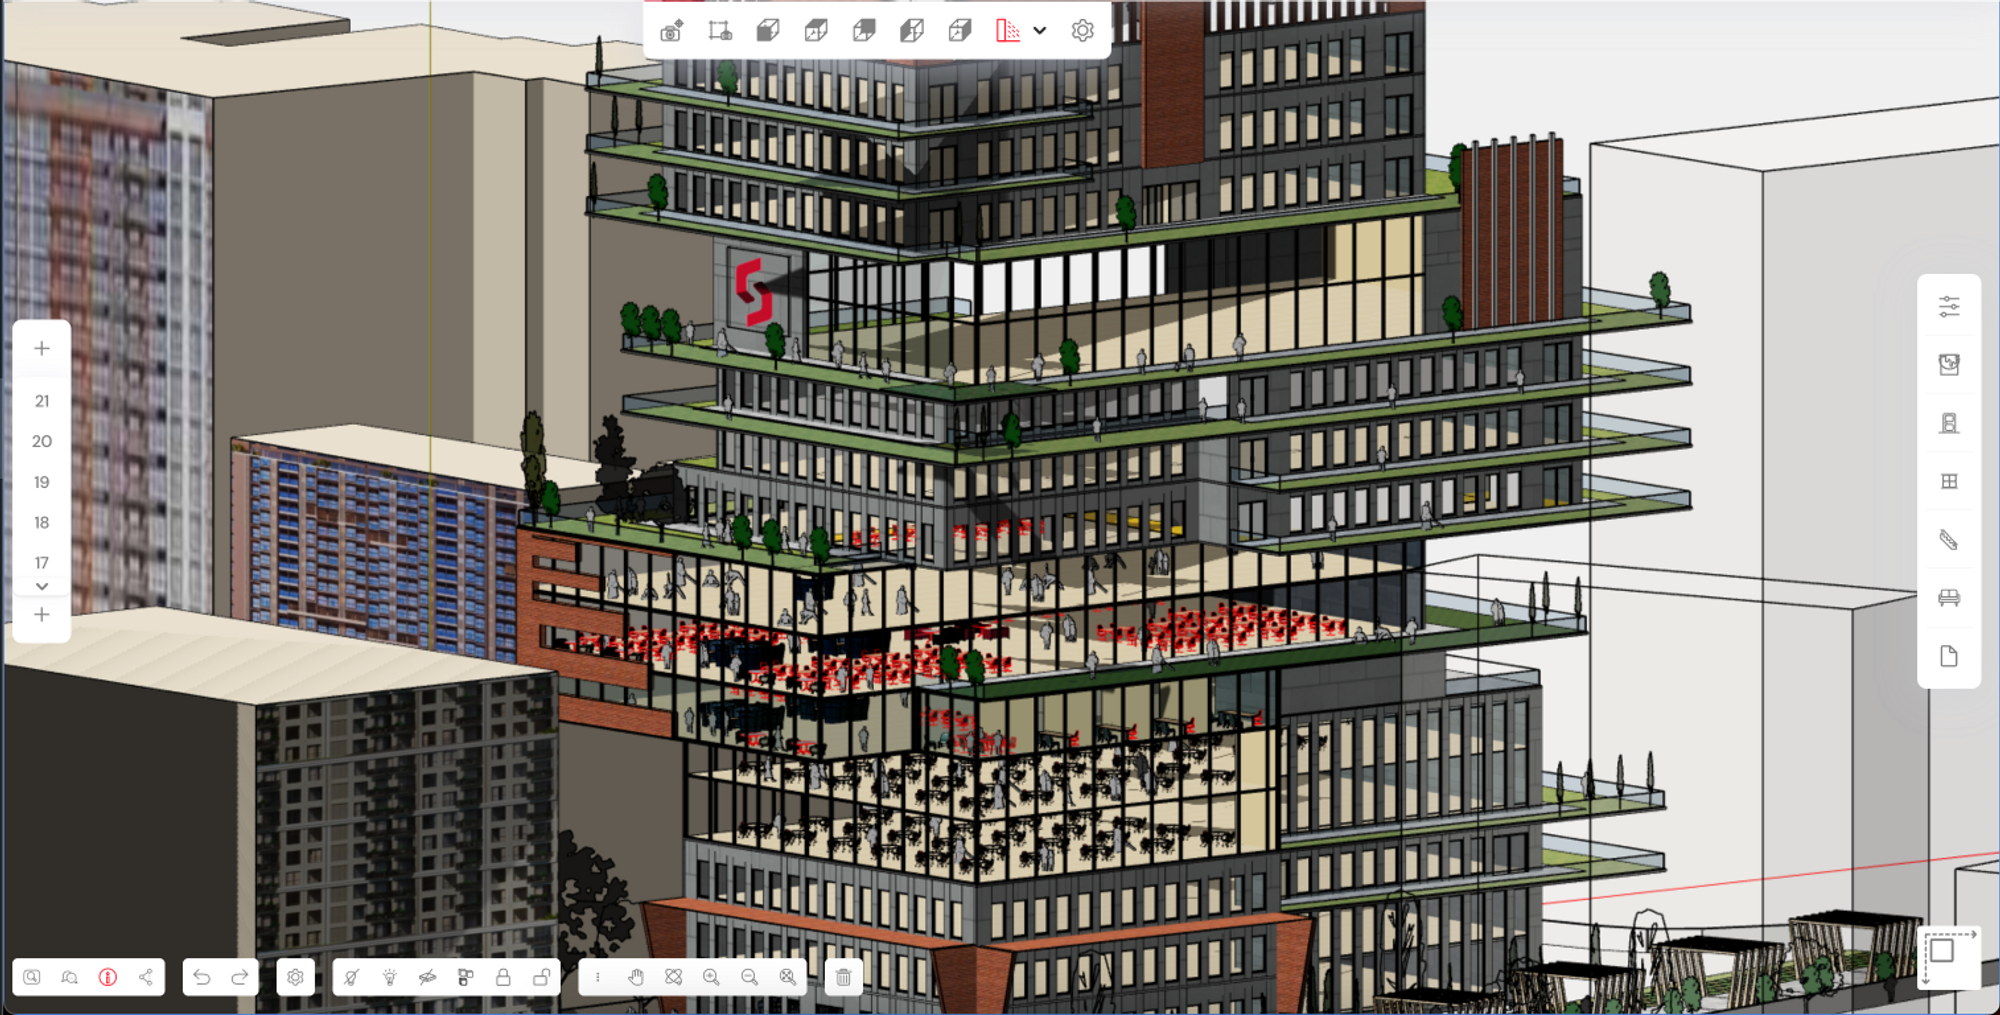
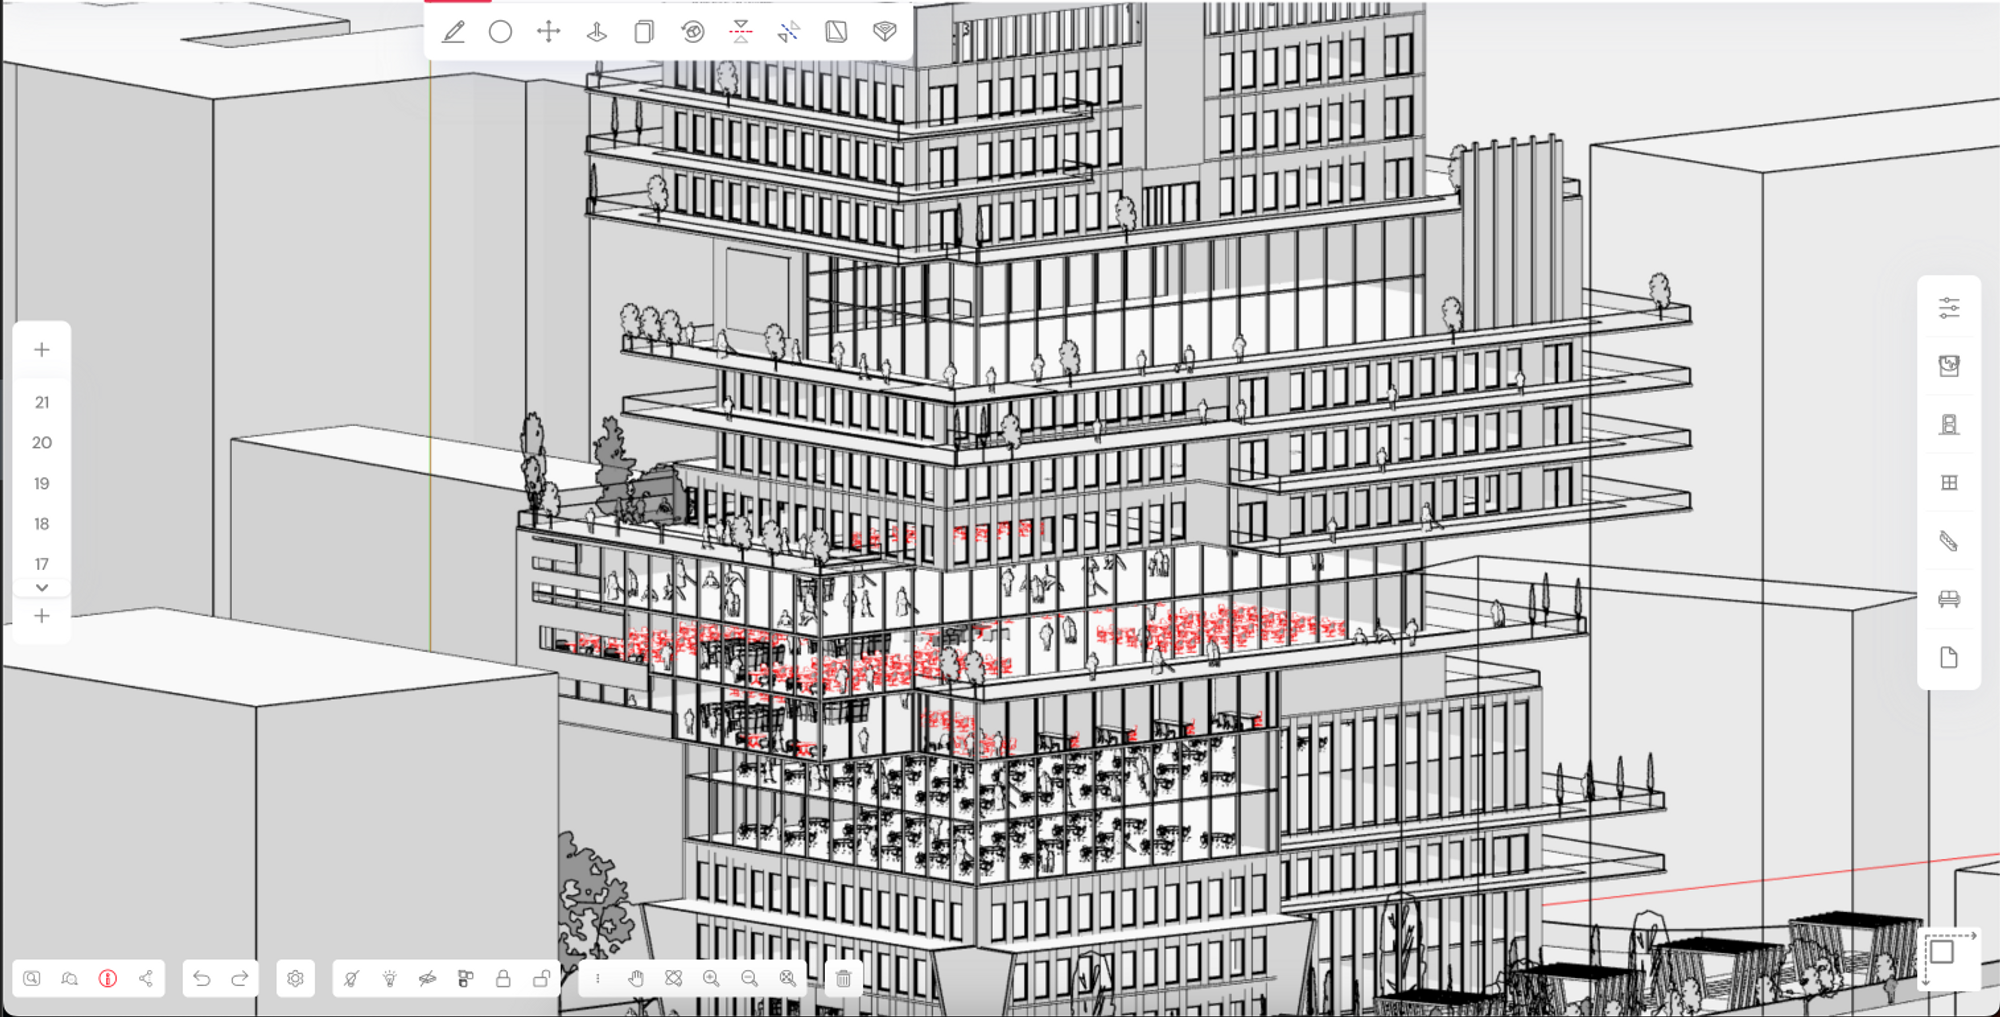
We've revamped the default 3D visuals with improved lighting and shading. As a result, models appear more realistic, with object faces lit up or shaded based on their orientation. In addition, you can change View Settings to Hidden Line for the best visualization results.
Advanced Boolean Operations
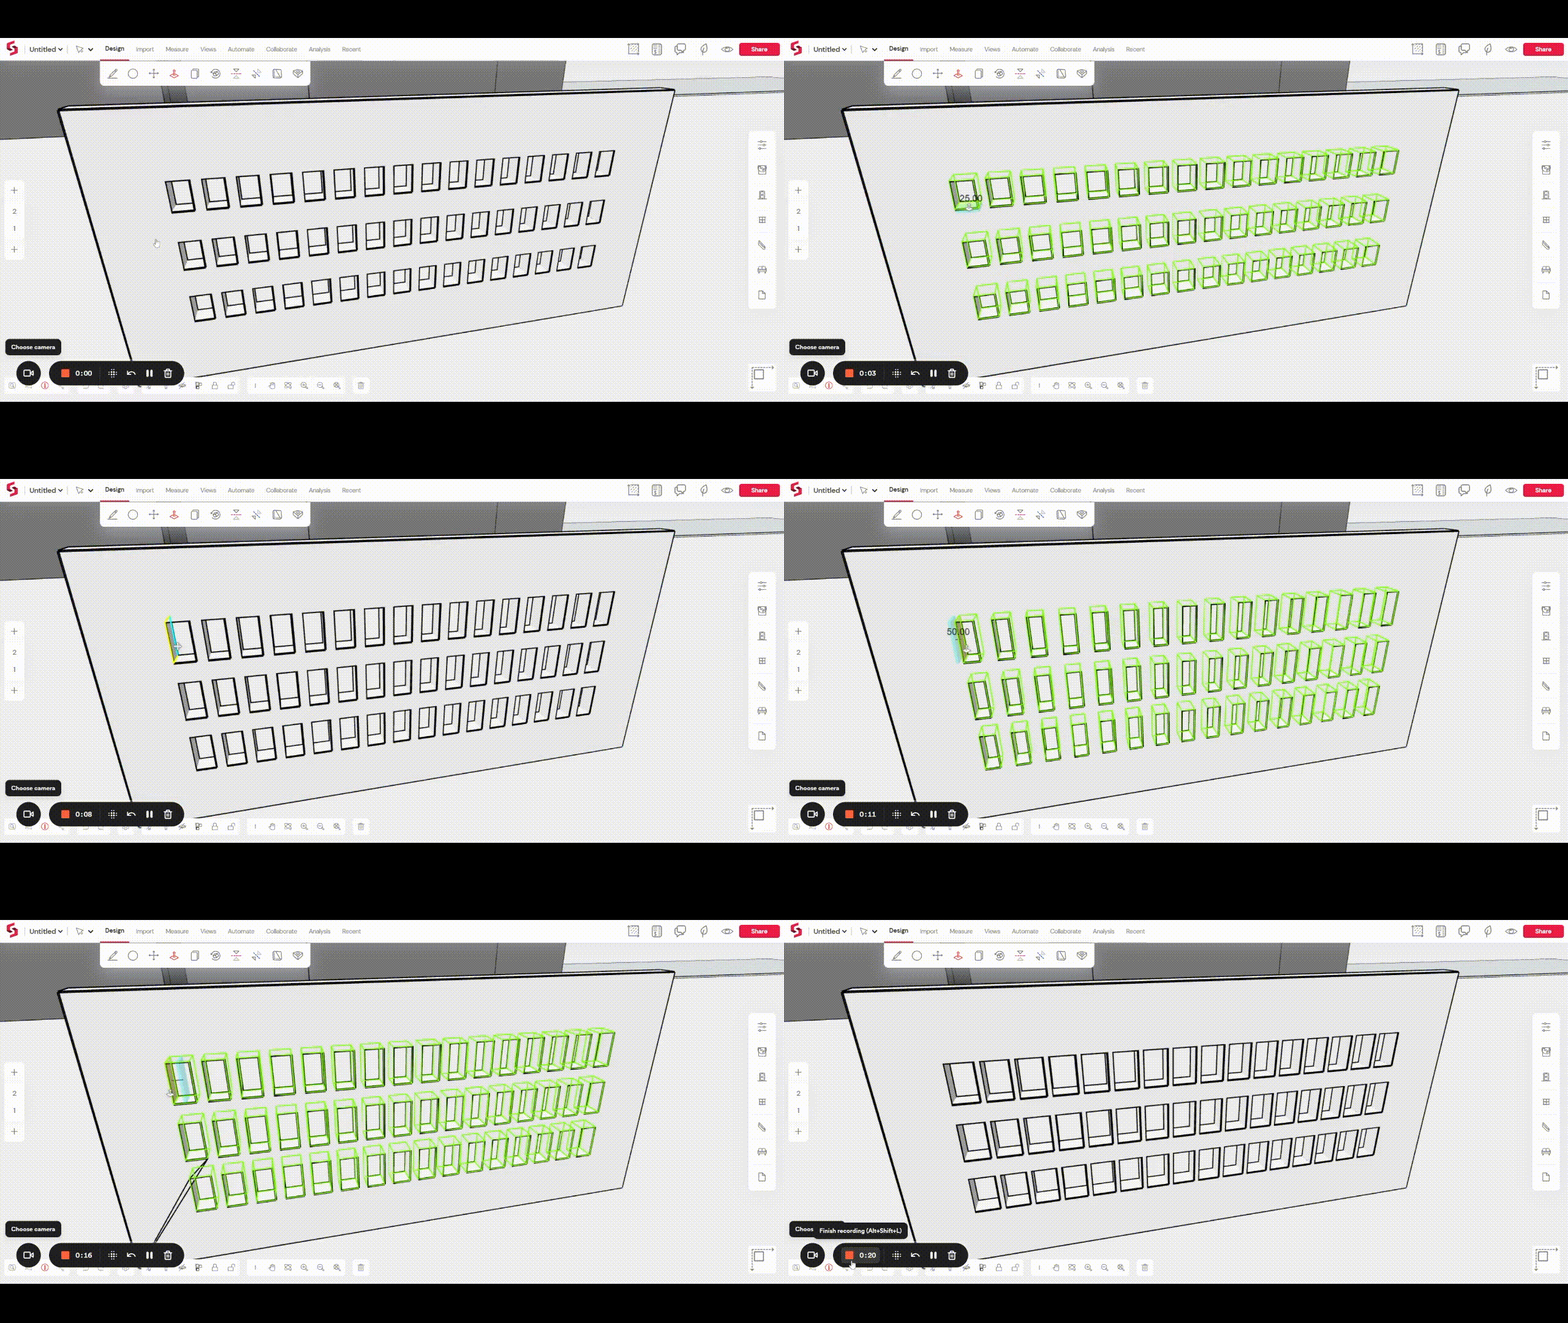
Our revamped geometry engine makes it easier to deal with really complex boolean operations. Drawing and editing 3D BIM objects are more accessible, with increased flexibility in defining their shape. You can draw any form (in 2D or 3D!) and assign it the properties of a wall, slab, or floor in just a couple of clicks. You can draw void forms and copy them to create parametric components without thinking of complex relationships or parenting.
Curved Geometry
We've extended design freedom beyond orthogonal geometries with the launch of arcs. Arcs in Snaptrude are defined by their start point, endpoint, and radius. Using the same Draw tool, you can draw spaces that combine arcs and lines. The shortcuts A and L allow you to quickly toggle between Arc and Line modes while drawing.
.png)
Slideshow Walkthroughs
The Comment feature is now upgraded to improve asynchronous collaboration with the team and stakeholders. Commenting is possible both in 3D and on plans. Elements in the model can be tagged or clouded with revision clouds to indicate changes. Every revision cloud or tag is tied to a textbox where users can leave comments, attach reference images, track conversations, and change issue status. When a revision cloud is added, Snaptrude automatically saves the view in which it was created, so it's easy to come back and review updates on the model.
Viewer for Mobile Devices
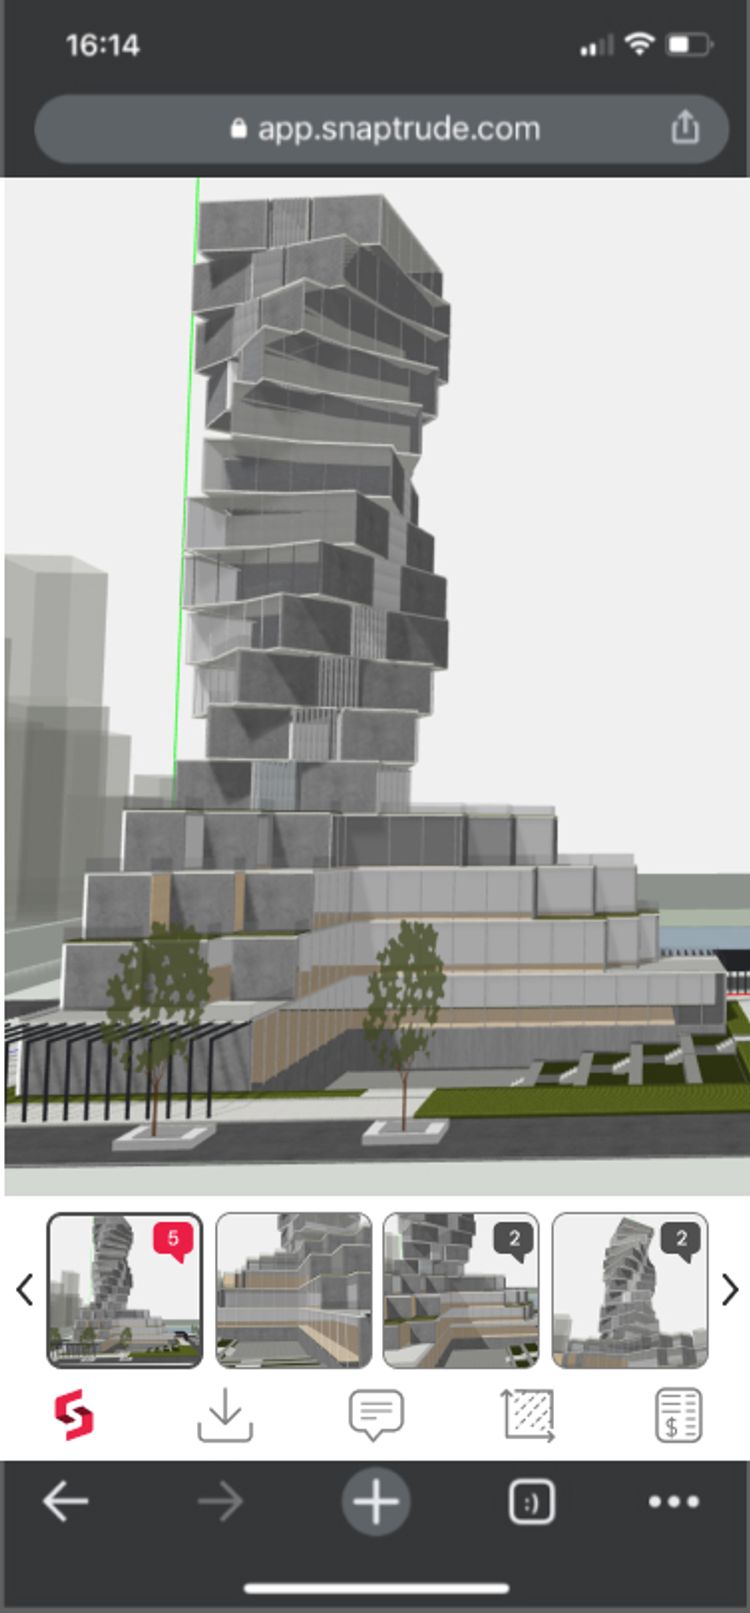
You can now view Snaptrude models and comment on them on the go, with any mobile device. Open up the model through the mobile browser, and use the device's built-in gestures, like pinch, tap, etc., to navigate the model. You can also access comments, resolve them or reply to them from anywhere.
In-Browser Rendering
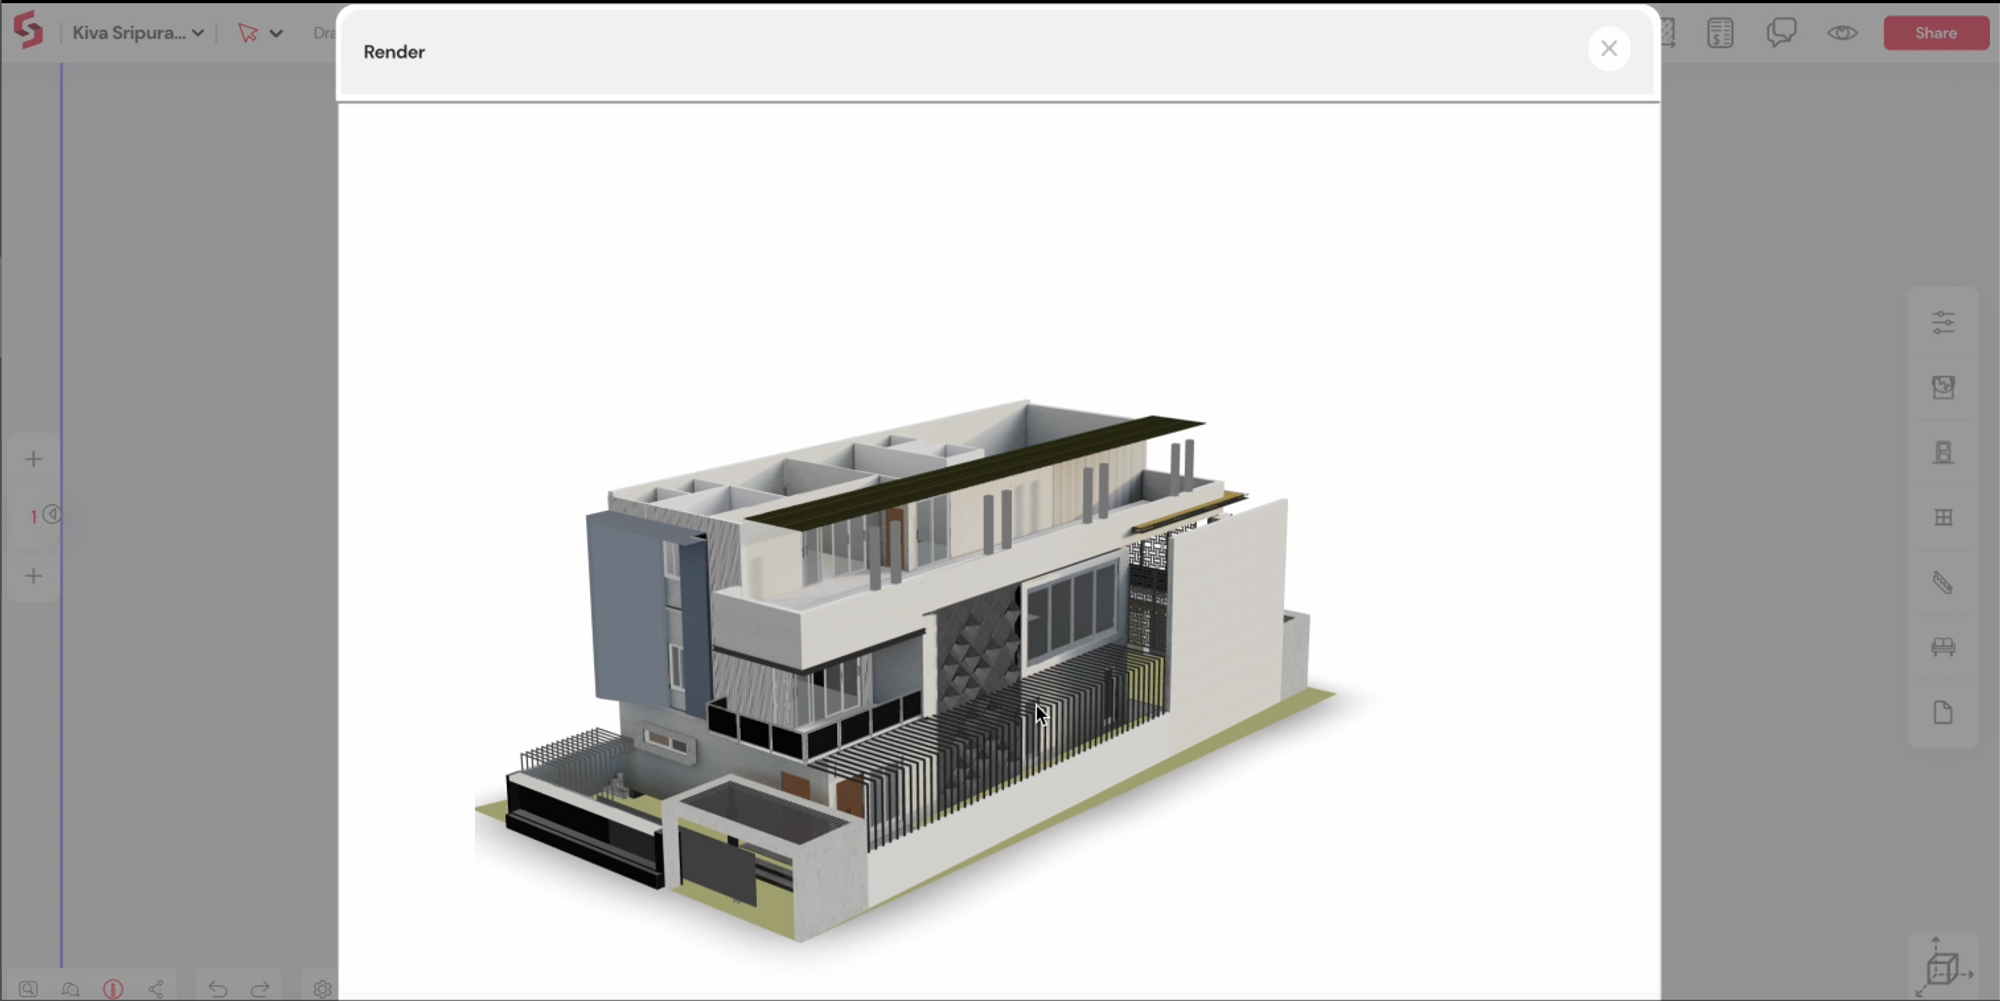
We've integrated a rendering engine to help you create 3D, texture-baked renders right within Snaptrude's modeling environment. Click on the Render tool and select the quality. When ready, the render window opens in a new browser tab, and the entire 3D model is rendered in one go. You can easily create walkthroughs and navigate to previously saved views. You can also share the rendered model directly with your client, who can navigate the model and comment on it in the rendered environment!
Improved Quantity Takeoff
The quantity accuracy of civil works, finishes & fenestrations is vastly improved, matching industry calculation standards. Over the last few months, we collaborated closely with clients in the industry to improve the accuracy of our quantity takeoffs. You can also download a detailed BoQ as an excel file containing an item-wise breakdown, complete with object IDs and required dimensions, to share with your team for verification or update.
